Showing posts with label Valentine's Day. Show all posts

Sunday, February 1, 2026

Flourish Heart


Supplies:
Stamps: Stampin' Up Sealed With Love
Ink: ColorBox Chianti
Paper: Gina K White, Stampin' Up All My Love DSP, Flirty Flamingo, ColorMates: Dark Racy Raspberry
Accessories: Concord & 9th Stitched Vines Card Front Die, Simon Says Stamp: Flourish Heart Die and Flourish Heart Trio Die

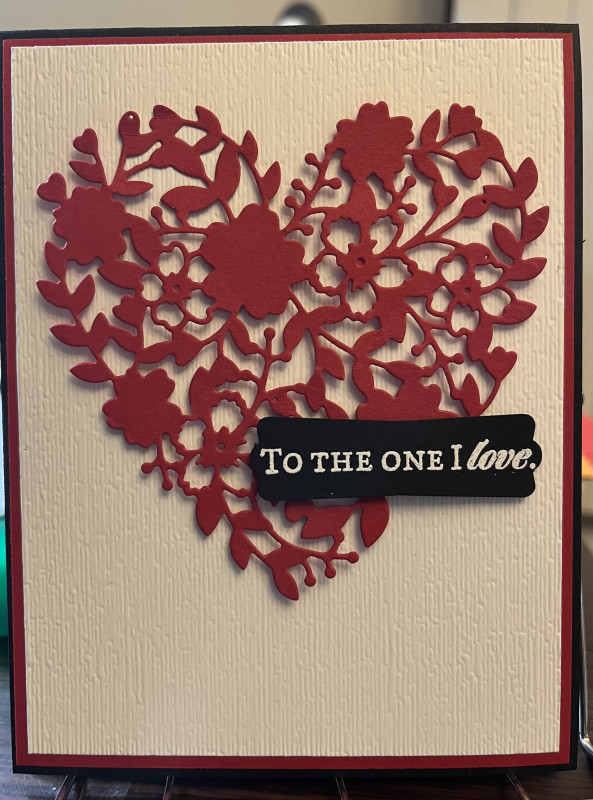
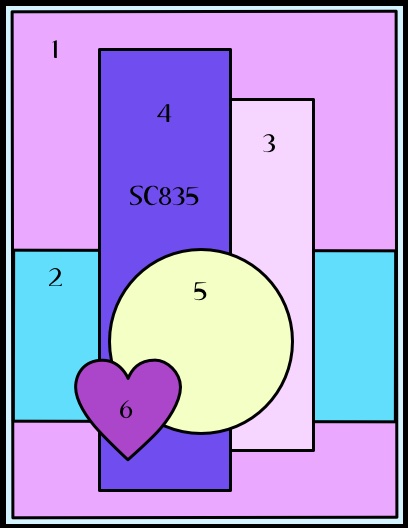
Hello Stampers!  I'm back to share a card I made using this week's Sketch of the Week over at Freshly Made Sketches.
For my card I started by die cutting the flourish heart.  Then I picked out some DSP for the strip on the left and matted it with some dark racy raspberry.  Next I die cut the card front with the stitched vines card front die.  To finish the card I adhered it all of the pieces together.  For the inside I adhered some small flourish hearts and stamped the sentiment.  

Thanks so much for stopping by!
Terri


Friday, January 23, 2026

Love


Supplies:
Stamps: Stampin' Up Sealed with Love
Paper: Gina K White, ColorMates Dark Racy Raspberry, Stampin' Up All My Love DSP and Flirty Flamingo
Ink: ColorBox Chianti
Accessories: Penny Black Heartfelt Dies, Stampin' Up Hearts of Elegance Dies, Honey Bee Gems

Hello Stampers!  Anyone else home from work today with the -45 degree wind chill?  Brr!  So what better way to stay warm, than hangin' out in the craft room!  I made this card for two challenges.  One is the Free for All Challenge over at Splitcoaststampers: Feeling a Little Square.  And the other challenge is the sketch challenge over at Freshly Made Sketches!
For my card I started by selecting a patterned paper.  I cut that patterned paper down to a square and matted it with the dark racy raspberry cardstock.  From there I found two hearts that coordinated and die cut them.  I laid them into place and worked on the sentiment.  I was looking for a stamp, but then I remembered I got the scripty love die cut and thought that would be fun.  So I ran some white cardstock through the xryon and adhered three of the love die cuts together to make it stand out more.  Now I was able to assemble the card.  I adhered everything down and then finished it off with some gems.  For the inside I kept it simple.  Although it took forever to find an ink that matched my cardstock.  Stampin' Up needs to add a cranberry color to their collection!  LOL!!  

Thanks so much for stopping by!!
Terri

Tuesday, December 30, 2025

Swirly Heart


Supplies:
Stamps: Stampin' Up: Endless Love
Paper: Stampin' Up White, Flirty Flamingo, Real Red, Made With Love 12x12 DSP
Ink: Memento Tuxedo Black and Stampin' Up Real Red
Accessories: Stampin' Up: Stylish Shapes Dies, Real Red thick twine, Party Banners Die, Endless Love Dies, Pattern of Friendship Die, dimensionals, Waffle Flower: Nesting Circles Dies, Honey Bee Gems, Score Tape

Hello Stampers!  I'm here to share a Valentine card I made today.  I started with the focal image.  I die cut the heart, adhered it to a circle that I die cut using the Stylish Shapes Dies, and added some gems for some sparkle.  Next I matted the circle with real red cardstock using one of the Waffle Flower Nesting Circles Dies. I decided to pop up the focal image with dimensionals onto one of the Party Banners Dies.  Before I adhered it I ran the banner through the die cut machine with the Pattern of Friendship Die.  I thought it needed a little something, so I found some real red thick twine and that worked out great!  To finish the card I picked out some DSP, matted it with white, and adhered it to the real red card base.  When I adhered the party banner to the DSP I did have to use score tape so it would stick.  The texture from the Pattern of Friendship die would not stick with just a tape runner.  For the inside of the card I did some simple stamping for a sentiment.

That's all for now!  Thanks for stopping by!!
Terri

Sunday, February 9, 2025

Gold Floral Heart


Supplies:
Stamps: SU Sealed With Love
Paper: Gina K White and Simon Says Stamps Matte Gold Cardstock
Ink: SU Rococo Rose, Distress Ink: Spun Sugar and Victorian Velvet
Accessories: SU Self Adhesive-Backed Heart Sequins, SU Heart Shaped Dies, Perfect Pearls Mists: Heirloom Gold

Hello Stampers!  I'm here to share a card I made for the Featured Stamper Challenge over at Splitcoaststampers.  Here is my inspiration card:
I started by creating the background.  I inked up an acrylic plate up with Spun Sugar and Victorian Velvet distress inks.  Then I spritzed it with water.  I took my paper and smooshed it onto the acrylic plate until I had inked up until I liked the look of it.  I let it dry and then spritzed on some gold Perfect Pearls Spritz.  After the gold was dry I matted this layer with matte gold cardstock, and then I adhered the gold heart.  Then I adhered this layer to a white card base.  For the inside I stamped the sentiment and added some gold hearts.  That's all for now!  Thanks for stopping by!
Terri

Monday, January 20, 2025

Happy Valentine's Day


 Supplies:
Stamps: Stampin' Up: Teeny Tiny Wishes and Lots of Heart
Paper: Stampin' Up: Real Red and Powder Pink, Gina K White, PaperCut: Bubblegum
Ink: VersaMark and Stampin' Up Real Red
Accessories: Gina K Master Layouts 7, Stampin' Up Many Hearts Dies and Heart Shaped Dies, White Embossing Powder

Hello Stampers!  I missed yesterday's challenge because I was taking down all of our Christmas decorations and tree!  What a job that is!  I actually have the day off today, so I made today's card for the Clean and Simple Challenge: Monochromatic over at Splitcoaststampers.  And I am hoping to make another card today also!!  

For my card I started by picking out the cardstock.  Then I die cut the heart in the three different shades.  I layed them out and decided to make a mini slimline card using Gina K's Master Layouts 7 dies.  After I die cut the white layer I adhered my hearts.  Then I heat embossed the sentiment and die cut it out using a banner die.  I used dimensionals to pop up the sentiment.  For the inside I stamped and die cut the hearts and adhered them to the inside of the card.

That's all for now!  Thanks for stopping by!
Terri

Sunday, January 5, 2025

Love


Supplies:
Stamps: SU Sealed With Love
Ink: SU Melon Mambo
Paper: SU Melon Mambo and Gina K White
Accessories: Simon Says Stamp: Dotted Hearts Embossing Folder and Cutting Die, Waffle Flower: A2 Piercing Panel Die, SU Well Written Framelits Dies, Offray Ribbon, Honey Bee Gems

Hello Stampers!  I'm here to share a card I made for the Featured Stamper Challenge over at Splitcoaststampers.  Here is the card that was my inspiration:

For my card I started with a Melon Mambo card base.  Then I cut and embossed the white layer.  Next I die cut a few hearts in Melon Mambo, and embossed them individually.  I cut a background for the hearts and die cut it with the A2 Piercing die, and then matted it with Melon Mambo card stock.  I adhered the ribbon onto the focal layer and then popped up the strip of hearts on top of the ribbon.  I die cut a few more hearts and adhered them onto the embossed layer, and die cut the word love and adhered it on the embossed layer as well.  To finish it off I added some gems to the center of the flowers on the hearts.  For the inside I kept it simple.  I made a die cut strip and matted it with Melon Mambo cardstock, and stamped a sentiment.

That's all for now!  Thanks for stopping by!
Terri

Sunday, February 18, 2024

Valentine Car Gnome


Supplies:
Stamps: SU Meant to Be (inside)
Ink: SU Real Red
Paper: Gina K White, SU Real Red, Basic Black, Balmy Blue, Blushing Bride, Pink Pirouette, Simon Says Stamp: Matte Gold and Silver Cardstock
Accessories: Spellbinders Gnome Drive Hearts for You and Gnome Drive Holiday, Honey Bee Fluttering Hearts Pierced Cover Plate

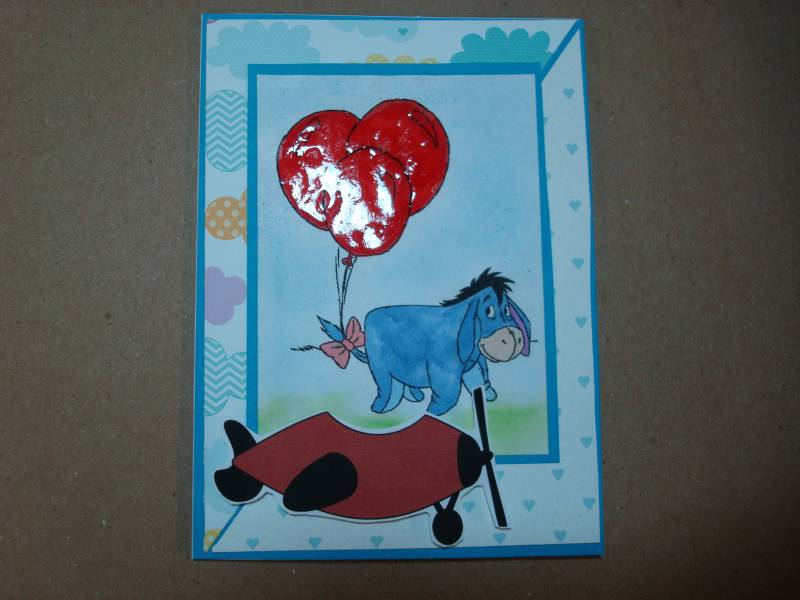
Hello Stampers!  I'm back to share with you a card I made for the Featured Stamper challenge over at Splitcoaststampers.  Here is the card that inspired my card.
For my card I used a car instead of an airplane, a gnome instead of Eeyore, and heart balloons instead of round balloons.  To make my card I started with the gnome, it is a bit time consuming but it is worth it.  It is so darn cute!  Next I cut a panel of white and matted it with blue cardstock.  I cut it so the balloons would go over the top a bit.  For the background I die cut the pierced hearts and adhered it to the card base.  For the inside I duplicate the pierced heart background and then cut a white panel and matted it in blue.  Lastly, I stamped the sentiment on the inside panel.

That's all for now!  Thanks so much for stopping by!
Terri 

Sunday, February 4, 2024

Jawsome!


Supplies: 
Stamps: Lawn Fawn Duh-Nuh, Lawn Fawn Happy Everything
Ink: Memento Tuxedo Black
Paper: Gina K white and Colormates: Light, Medium, Dark, and Deep Terrific Teal
Accessories: Lawn Fawn Duh-Nuh dies, Copic markers, Essentials by Ellen: Strands

Hello Stampers!  I squeezed in one more card this weekend!  The CAS challenge on Splitcoaststampers is to make a Valentine with non-traditional colors.  To make my card I cut the front panel of my card and then die cut the Strands die.  Then I put some low tac tape behind the front panel so I could paper piece the teal pieces into the die cut.  I tucked in my die cut shark that I colored with Copic markers into the strands.  Then I used my Misti to stamp the sentiment.  To complete the front I adhered the front panel to the card front.  For the inside I used my Misti to arrange the shark and sentiment, and then colored in the shark with Copics.  I adhered this panel to the inside of my card.

Thanks so much for stopping by!  I'll be back next weekend, have a great week!!
Terri

Hedgehog Valentine


Supplies:
Stamps: SU Teeny Tiny Wishes, SU Lots of Heart (inside), 
Ink: VersaMark and SU real red
Paper: SU From My Heart Specialty DSP, SU Zoo Crew DSP, SU Real Red and Gina K White
Accessories: May Arts Twine, Brutus Monroe Alabaster White embossing powder, Waffle Flower Scalloped Circles Die, SU Many Hearts Dies, SU Stitched Circles Dies, Copic Markers

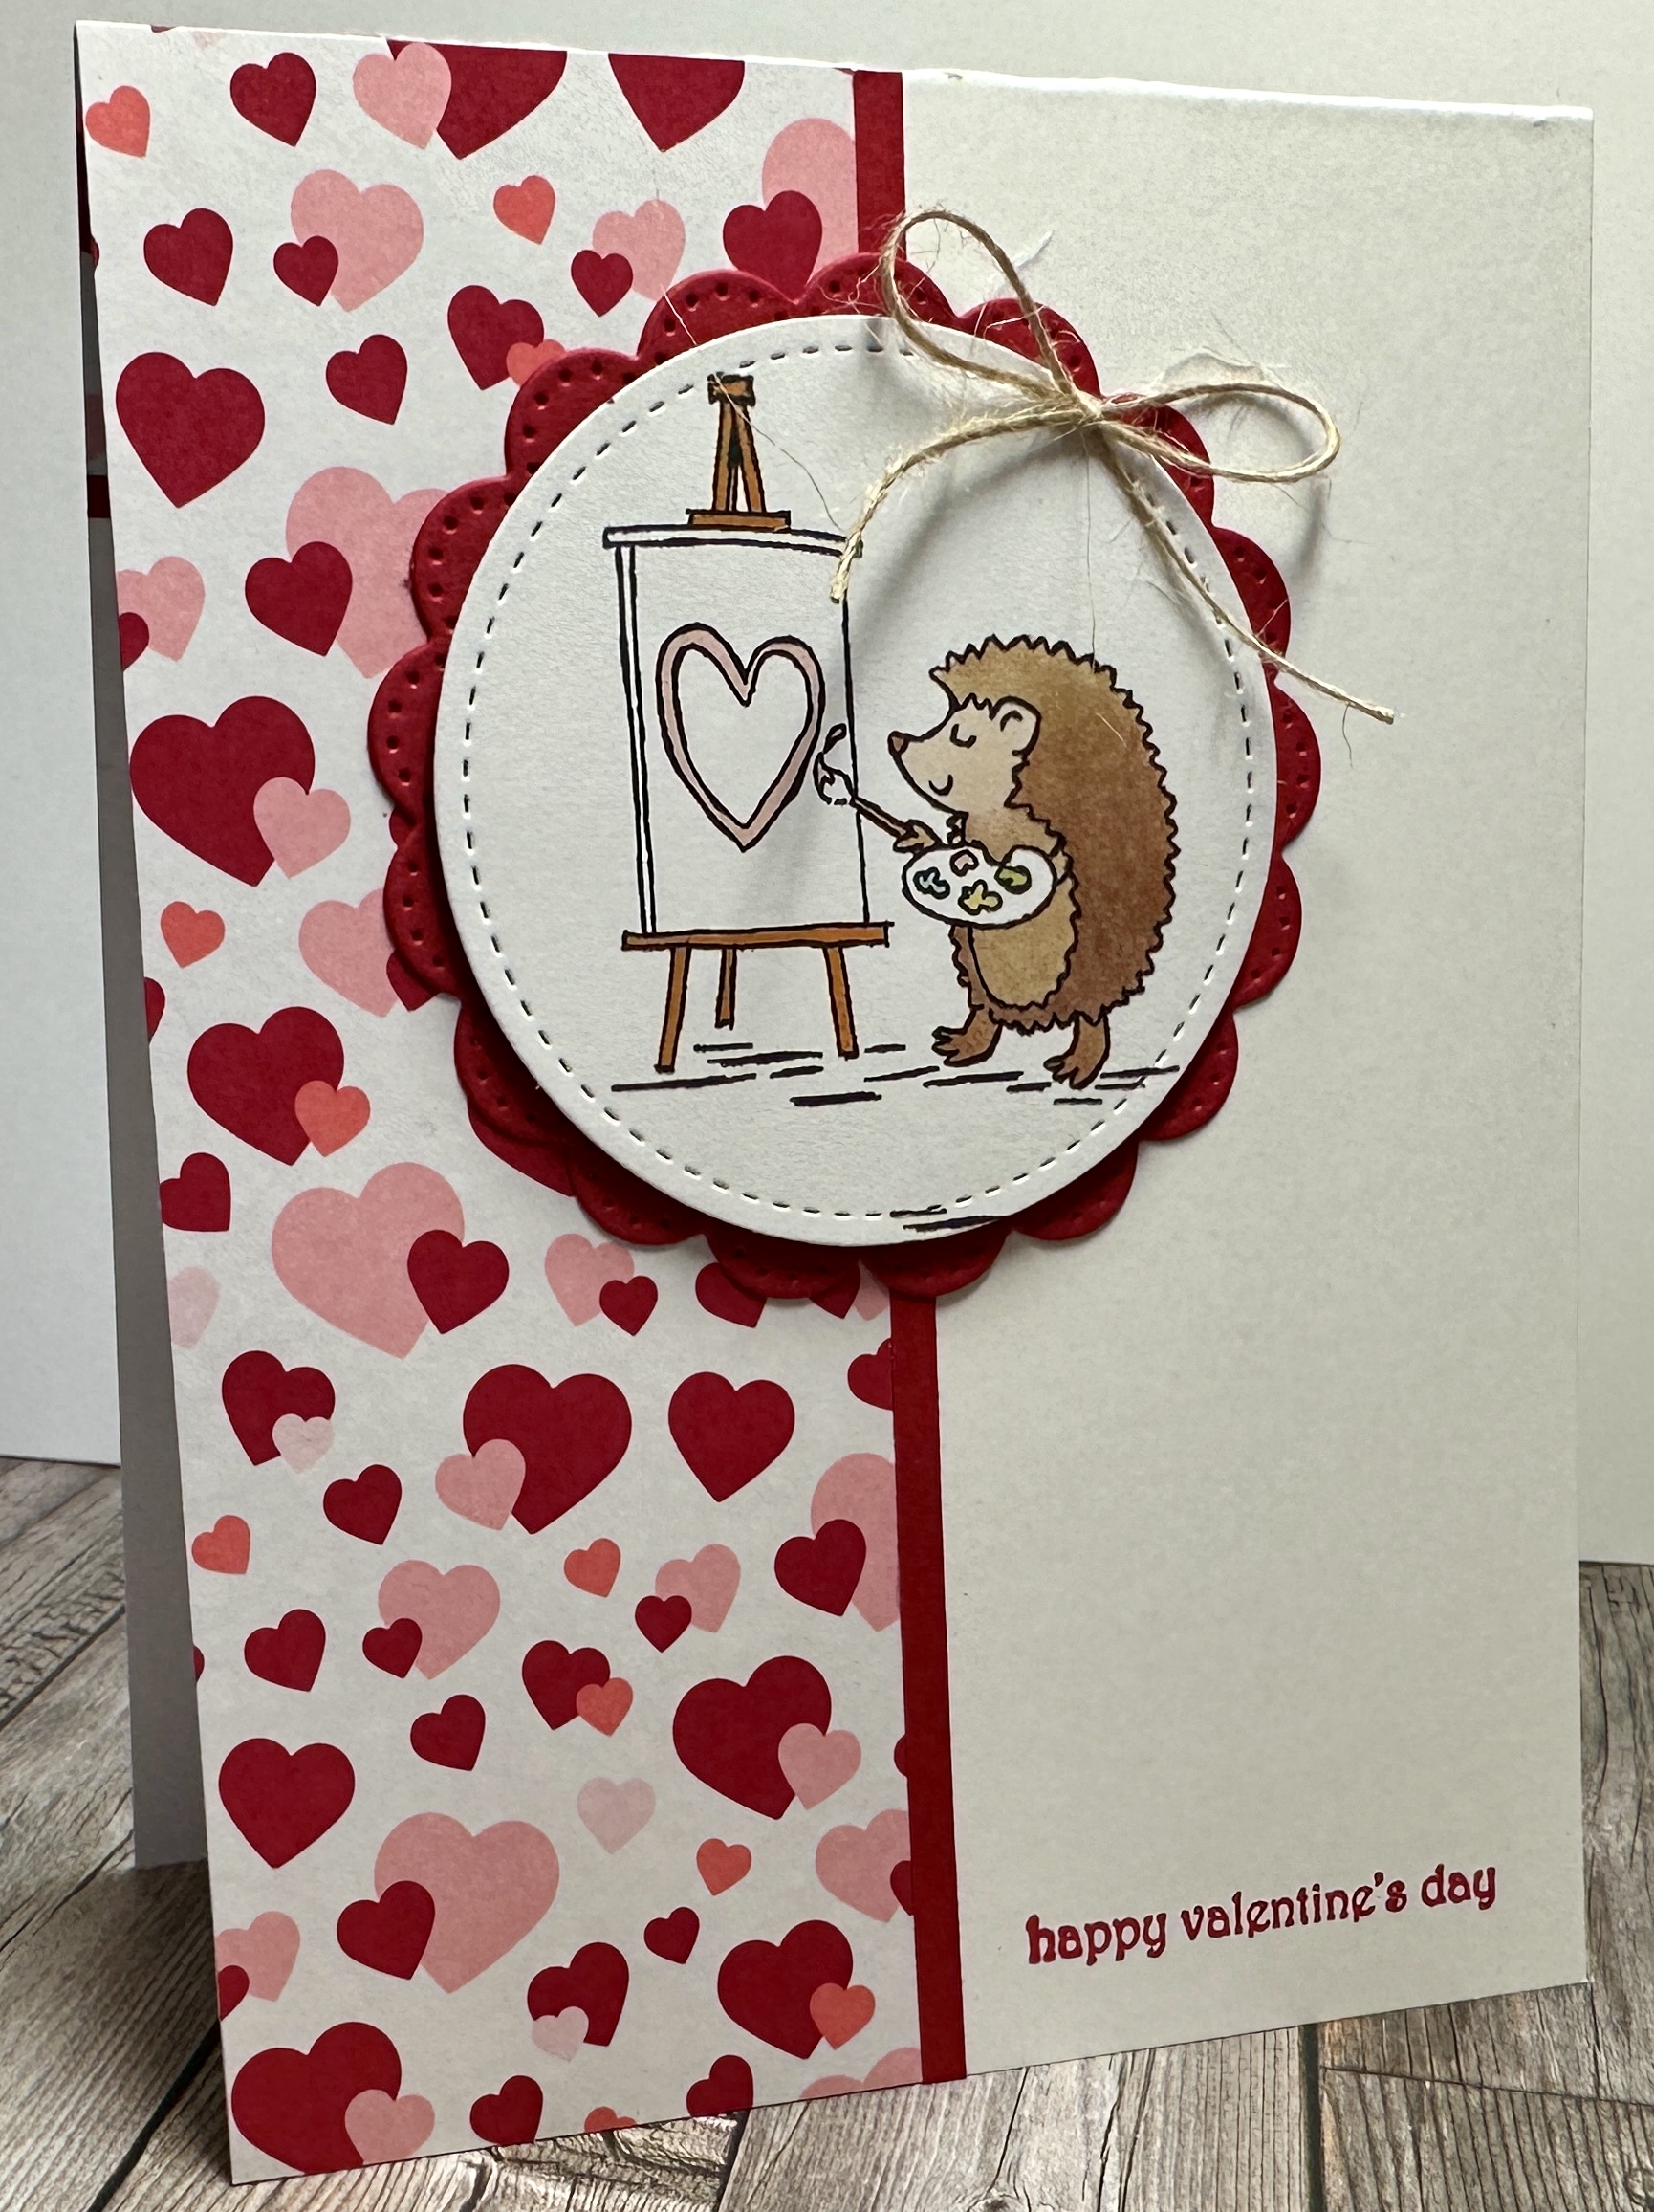
Hello Stampers!  I'm back to share my card for the Featured Stamper challenge over at Splitcoaststampers.  Here is the card that I CASED:
For my card I started with the focal image.  It is actually not a stamped image.  I die cut the hedgehog with a stitched circle die from the Zoo Crew DSP.  The hedgehog wasn't colored in so I used my Copics to color in the image.  Then I die cut a scalloped circle as a mat for it.  I popped up the focal image on the red scalloped circle and added a twine bow. Next I found some DSP that coordinated with the image and added a strip to the left and added a thin strip of real red cardstock to give the DSP a finished look.  To finish the front I used my Stamp a ma Jig to stamp the sentiment.  For the inside I added a strip of the DSP and a strip of red cardstock.  I heat embossed the sentiment onto a red heart and that completed this card.

That's all for now!  Thanks so much for stopping by!!
Terri

Friday, January 19, 2024

Valentine Gnome Card


Supplies:
Stamps: SU XOXO, Hero Arts: Valentine's Day (inside)
Ink: SU real red
Paper: Gina K white, SU real red, and peach from stash
Accessories: SU be mine stitched framelits dies (inside), 1 1/4 inch circle punch, baker's twine, Honey Bee Fluttering Hearts Pierced Cover Plate, Waffle Flowers A2 and Additional A2 Dies, Jaded Blossom: Gnome dies and Valentine Add-ons, and SU dimensionals

Hello Stampers!!  I'm sharing a card that I made for the Free 4 All Challenge: Hearts over at Splitcoaststampers.  I started this card by assembling the Valentine gnome.  I picked up this Valentine add-on set at a rummage!!  It is soo cute!  After I completed the gnome, I decided to use the pierced hearts cover plate as the background to the gnome.  Then I grounded the gnome with some baker's twine.  I wanted some sort of greeting on the front, as I felt it needed a little somethin' somethin'.  I found the stitched love image and that was just the ticket.  I stamped it and punched it out with the circle punch.  Then I trimmed off the top edge so it was in line with the white layer.  From here I added a red mat and adhered it to the card.  For the inside, I used a stitched heart die to make the heart, and then I used my stamp a ma jig to stamp the greeting inside the heart.

That's all for now!! Thanks for stopping by!!

Terri 

Sunday, February 26, 2023

XOXO

Supplies:
Stamps: Clearly Besotted: Sweet Little Sentiments
Ink: VersaMark
Paper: Gina K white, and Stampin' Up Real Red Glimmer Paper
Accessories: Gina K Squares large and small sets and Master Layouts 3, Brutus Monroe Alabaster White embossing powder, dimensionals, Simon Says Stamp: Filigree Heart, Concord and 9th Quilted Card Front

Supplies: 
Stamps: Unity/Gina K You Had Me At Hello
Paper: Gina K white and Stampin' Up Real Red Glimmer Paper
Ink: Stampin' Up Real Red


Hello Stampers!  I made this card using two challenges.  One is the sketch challenge over at Paper Players
. And the other challenge is the Featured Stamper Challenge over at Splitcoaststampers.  To make my card I started with the Filigree Heart.  I die cut it, and then die cut a stitched square around it.  I framed this with some real red glimmer paper.  For the card front I die cut it with the Concord and 9th quilted card front die.  I adhered the heart to the card front, and then it was time for the sentiment.  First I heat embossed the sentiment in white on a black banner, but I didn't like it.  Then I stamped the sentiment in red on a white banner, again I didn't like it.  Then I thought can I heat emboss on glimmer paper??  So I gave it a try, and surprisingly enough it worked!  So I popped the sentiment up with some mini dimensionals.  For the inside I kept it simple.  I stamped the sentiment with real red on a white square and then matted it with some red glimmer paper.  I love all of the sparkle on this card.  It was hard to capture the glimmer in my photo.  Thanks so much for stopping by!!
Terri


Sunday, May 8, 2022

Heart Trio


Supplies: Paper: SU real red, Gina K white and black Accessories: Martha Stewart punch around the page heart, SU playful pets twine, Gina K Master Layouts 7

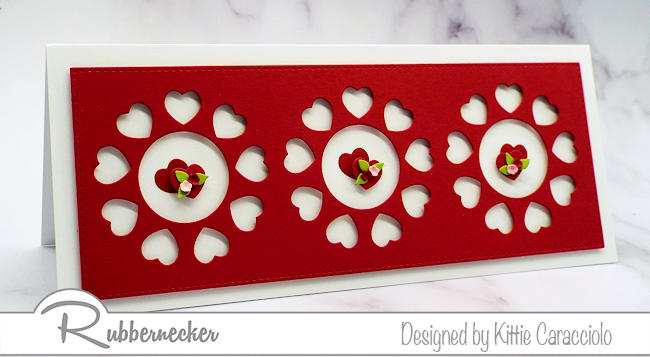
Hello Stampers!  Today's Featured Stamper on Splitcoaststampers is Kittie!  I love Kittie's style, her use of die cuts is amazing!  Here is the card I chose to CASE.

For my card I made a mini slimline.  I used the master layouts to die cut a piece of red cardstock.  Then after lots of measuring I punched out the hearts on the focal panel.  I put a piece of white cardstock behind the hearts, and tied on some black twine.  I adhered this to a black layer that I cut out using the master layouts die. Lastly I adhere the focal panel to my card base.

That's all for now, thanks for stopping by!
Terri

Monday, January 11, 2021

Die Cut Heart Card

Supplies: Paper: Gina K white Accessories: Offray white ribbon, Simon Says Stamp: Detail Floral Heart and Detail Petal Plate, Sizzix card scallop circle insert

Hello Stampers!  The Clean and Simple challenge on Splitcoast Stampers was to CASE yourself!  I chose to CASE this card:

For the embossing I die cut the detail petal plate, I used the same ribbon and scalloped circle, and I changed the butterfly to a heart that I popped up.  It was really hard to get a good picture of the card with the detail at the bottom.  Well that's all for now, I better go make dinner!

Thanks for stopping by!

Terri


Sunday, January 10, 2021

Happy Valentine's Day

Supplies: Stamps: Unity/Gina K: You Had Me At Hello Ink: VersaMark Paper: white, black onyx, and red Accessories: Stamp a ma Jig, ribbon

Hello Stampers!  Happy Sunday!  I got all of my laundry and cleaning done before lunch today so I would have the afternoon to play in my craft room.  Today I made a card for the Gina K Monthly Mix Challenge, to use mostly red.  So I stamped and embossed the heart and greeting, using my Stamp A Ma Jigonto a piece of red cardstock.  I stamped toward the bottom so I could have a piece of ribbon at the top.  After I tied the ribbon on I adhered it to a black panel, and then onto a white card base.

That's all for now!

Terri


Saturday, January 9, 2021

Gingham Heart Valentine

Supplies: Stamps: SU Lots of Heart Ink: Memento tuxedo black Paper: white and real red Accessories: baker's twine and SU Many Hearts Dies, dimensionals, Wrapped in Texture. embossing folder

Hello Stampers!  I made it through a week on virtual learning with kindergarteners!  Thank goodness we go back to the blended format on Monday.  It was nice being home though.  Today's challenge on Splitcoast Stampers is the Inspiration Challenge.  Here is the picture that I got inspiration from:

The red gingham in the picture inspired me to use the gingham heart in the Lots of Heart stamp set.  To make the card I started with the hearts.  For the white heart I die cut a white heart and then embossed it.  I also cut out a red frame for the heart.  For the gingham heart I stamped and then die cut the heart, and added a die cut red frame to it.  Next I cut out the focal panel and matted it in red.  I adhered the white heart directly to the paper with its frame, and then I popped up the gingham heart so I could do a ribbon treatment with baker's twine.  After this I ran a piece of red paper through the Xyron, die cut the swirly heart border, and adhered it to the bottom of the card.  Lastly, I stamped the sentiment and adhered the focal panel to the card base.  

That's all for now!  Thanks for stopping by!!

Terri


Wednesday, January 6, 2021

Valentine Sketch

Supplies: Stamps: SU Meant to Be Ink: SU real red Paper: real red, white, and Sending Love 6x6 DSP Ink: real red Accessories: Spellbinders scalloped circle, SU stitched circles, SU Be Mine stitched framelits dies
Hello Stampers!!  Today is the sketch challenge on SCS.  Here is the sketch:

This was a tough one for me.  I am not used to putting lots of layers on a card.  And it was tricky picking out patterned paper that goes together.  Using a 6x6 DSP paper stack helped.  So I picked out three patterns that I thought went well together.  Cut the different panels, and adhered them to the card.  For the sentiment I stamped and die cut it with the stitched circle die cut, and then matted it with a scalloped circle.  Then I added my heart that I had stamped and die cut.  Lastly,  I popped up the sentiment to help it stand out from the card.  

Thanks so much for stopping by!!

Terri


Tuesday, January 5, 2021

Be My Valentine

Supplies: Paper: white, and scraps from my stash Accessories: Lawn Fawn conversation hearts dies, Sizzix embossing folder

Hello Stampers!  I loved the theme of using something new for the New Year, so I made another card using some new supplies.  I have had them for awhile but I haven't used them until now!  Aren't those conversation heart dies the cutest??!!  The hardest part of the card was inlaying the letters in the hearts.  Otherwise this is a pretty quick and easy card.  After I die cut the hearts I found this Valentine embossing folder, and thought it would work well with the hearts below it.  I matted the sentiment with some pink cardstock and then adhered everything to the white card base.

Thanks so much for stopping by!

Terri


Monday, January 4, 2021

New Year New Stamps

Supplies: Stamps: SU Lots of Heart  Paper: SU real red and white  Ink: SU real red and Memento tuxedo black  Accessories:  SU Many Hearts dies

Hello Stampers!  I made this card for two challenges.  One is the Clean and Simple challenge on SCS and the other is the Paper Players Theme Challenge.  The theme for both of the challenges is to use something new for the New Year!  I am excited to share this card using the new Stampin' Up bundle Lots of Heart and Many Hearts dies.  To make the card I stamped the heart in real red, framed it with the white heart frame die cut, and matted it with the scalloped heart die cut.  Next I die cut the swirly heart border and adhered it to some white cardstock and matted it with red cardstock.  To complete the card I stamped a sentiment, adhered the heart and border to the focal panel, and then adhered it to the card base.

Thanks so much for stopping by!

Terri


Saturday, January 2, 2021

Sent With Lots of Heart

Supplies: Stamps: SU Lots of Heart Paper: cherry cobbler and white Ink: Memento tuxedo black Accessories: SU Many Hearts Dies, Offray ribbon, scoring board

Hello Stampers!  I made this for the inspiration challenge on Splitcoast Stampers.  Here is the inspiration image I chose:

I cut a piece of white cardstock 4x5.25 and die cut the three hearts at the bottom.  Then I added two score lines to frame the ribbon.  Next I used my Misti to stamp the sentiment.  To finish the card I added some ribbon, and adhered the focal panel to a cherry cobbler card base.  That's all for now!

Thanks for stopping by!!

Terri


Saturday, December 26, 2020

Valentine Wishes

Supplies: Stamps: Savvy Stamps: Valentine Wishes Script Ink: VersaMark Paper: Gina K white and black onyx, SU cherry cobbler. Accessories: Spellbinders: Vines of Passion, Cuttlebug embossing border, Brutus Monroe alabaster white embossing powder, dimensionals

Hello Stampers!  Happy Saturday!  The challenge on SCS today is the inspiration challenge.  There was a Pinterest board full of decorated doors to choose from as inspiration.  Here is the door that caught my eye.
The white heart against the black and deep red really caught my eye.  So I made some black panels using a Cuttlebug embossing border folder.  I started with two like the door, but on the card it looked like something was missing so I made a third panel.  It seemed to balance things out for me.  Then I adhered the panels to the cherry cobbler focal panel.  Next I die cut the white heart and popped it up using dimensionals.  For the sentiment I heat embossed it with detail white embossing powder.  Lastly, I adhered the focal panel to the card base.  I went back and forth between a white and kraft card base.  What would you have chosen?   Leave me a note in the comments.  

Thanks for stopping by!

Terri