Saturday, September 30, 2023

Cruising By to Wish You a Merry Christmas


Supplies:
Stamps: Kraftin' Kimmie Stamps: Holiday Wishes (inside)
Paper: Simon Says Stamp: Matte Silver, Gina K white, Stampin' Up: Old Olive, Balmy Blue, Night of Navy, Real Red, ColorMates: Light Caribbean Coral
Ink: VersaMark (Inside)
Accessories: Heffy Doodle Scripty Merry Christmas Shadow Dies, Spellbinders Gnome Drive Holiday, DCWV Gem Stickers, Stampin' Up Something Fancy Dies (inside), Waffle Flowers A2 Layers Dies, Stampin' Up Snowflake Sky embossing folder, pom pom

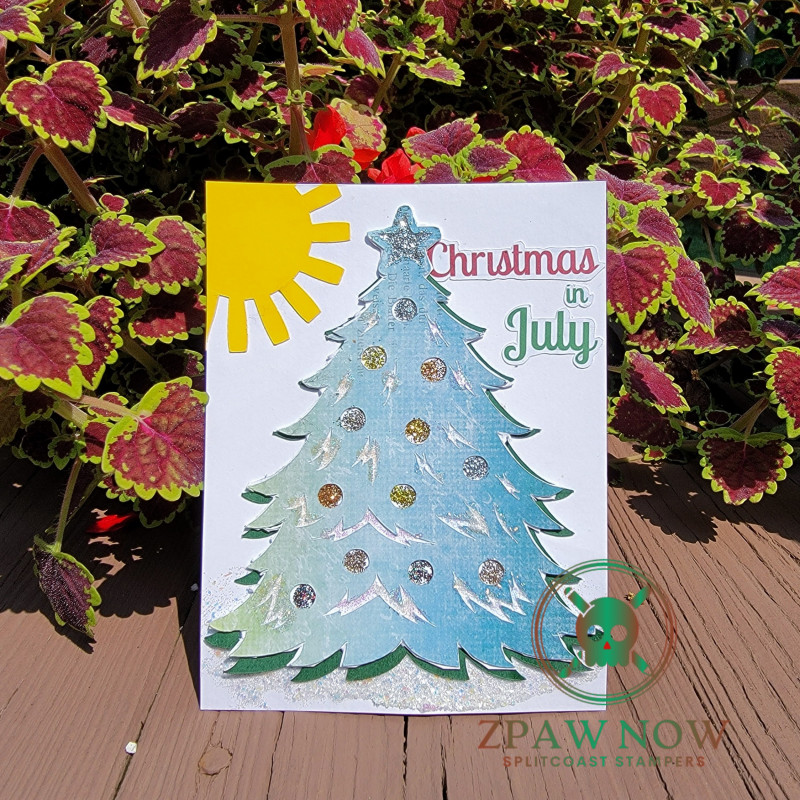
Hello Stampers!  I'm here to share with you a card that I made using 2 challenges.  The first is the Free 4 All Challenge on Splitcoaststampers: Clean and Simple Christmas Card, and I used the sketch from Freshly Made Sketches as a template for my CAS Christmas Card.  
For my card I started by creating the gnome driving the car.  This process took awhile, there are a lot of details to this die cut.  From there I decided the line under the circle would be another die cut.  So I die cut that and then decided to emboss the focal panel, and layer it with matte silver cardstock.  For the inside I heat embossed a sentiment and layered it.  So this is defiantly a CAS card, but a time consuming one!!  LOL!!

Thanks for stopping by!!
Terri

Sunday, September 24, 2023

Candy Cane Wishes


Supplies:
Stamps: Sweet N Sassy Holiday Cheer
Paper: Gina K White, SU Real Red, Lawn Fawn Peace, Love, Joy 6x6 paper pad
Ink: Memento Tuxedo Black
Accessories: Stampin' Up Layering Circles Framelits, Ribbon Offray, Pretty Pink Posh Scallop Boarders 1, Copic markers

Hello Stampers!  It is Featured Stamper Sunday over at Splitcoaststampers.  This week's Featured Stamper is Betty aka Sweet Irene.  This is the card I chose from her gallery to CASE.

For my card I started with a white card base.  Then I stamped, colored, and die cut my focal image, and matted it with a red scalloped circle.  Next I picked out some patterned paper, and added a red scalloped border.  I added a white ribbon treatment and stamped my sentiment on the card base.  To finish the card I adhered the focal panel to the card base.  For the inside I added some patterned paper with a scalloped edge and a sentiment.

That's all for now, thanks for stopping by!!
Terri

Sunday, September 17, 2023

Boo To You!


 Supplies:
Stamps: Stampin' Up Good Greetings, Taylored Expressions Simply Said Halloween
Paper: Gina K white, black onyx, and kraft, patterned paper from my stash
Ink: Memento Tuxedo Black
Accessories: Stampin' Up Stylish Shapes Dies, Memory Box Ghost Trio Dies

Hello Stampers!  I made this Halloween card for a couple of challenges.  The first one is the Clean and Simple Challenge on Splitcoaststampers: Halloween.  And the Freshly Made Sketches sketch of the week.
For my card I started by die cutting the ghosts and adding some black paper behind the eyes and mouth.  Then I found some patterned paper to use for the layer on the right and matted it with black cardstock.  I decided to make the card panel kraft so there would be contrast against the white ghosts.  I adhered the right strip to the kraft cardstock and then adhered my ghosts.  For the sentiment I stamped, die cut, and popped up the sentiment on the card.  To finish the front I just had to adhere the kraft layer to the white card base.  For the inside I added some die cut ghosts and added a sentiment.  

Thanks so much for stopping by!!
Terri

Oh Christmas Tree


Supplies:
Stamps: Hero Arts Wishing You Tree Bundle
Ink: VersaMark, Distress Ink: Rustic Wilderness, Mowed Lawn, and Bundled Sage
Paper: Gina K white, Simon Says Stamp Matte Silver Cardstock
Accessories: Stampin' Up Rectangle Stitched Framelits Dies, Spellbinders Hemstitch Rectangles, Honey Bee Clear Gem Stickers, Pickett Fence Blending Brushes, Gina K Master Layouts 3, Star Brad, Dimensionals, Ranger Silver Embossing Powder, Brutus Monroe Alabaster White, Waffle Flowers A2 Layering Dies

Hello Stampers!!  I made this card for two challenges, both from Splitcoaststampers.  The first is the Free 4 All Challenge: use a Christmas Tree, and the next Featured Stamper Challenge. Here is the card I CASED for the Featured Stamper Challenge:


I chose this card because I really liked the blended colors of the Christmas tree, and all of the sparkle!!  For my tree I started by ink blending a background for my tree.  Then I stamped, heat embossed, and die cut the tree.  I added gems to add some sparkle, and I added a star brad at the top.  For the sentiment I stamped, heat embossed, die cut it, and adhered it to the tree with dimensionals.  Then I die cut the layers.   The first was a hemstitch rectangle die, then Waffle Flowers A2 layering dies.  I adhered the tree to the focal panel, and adhered the remaining layers together.  For the inside I heat embossed the sentiment and die cut some rectangles to mat it.

That's all for now, thanks for stopping by!!

Terri

Tuesday, September 12, 2023

Butterfly Wishes


Supplies:
Stamps: Stampin' Up Go to Greetings, PaperTrey: Birthday Basics
Paper: Gina K white, and Stampin' Up Moody Mauve
Ink: Stampin' Up Moody Mauve
Accessories: Waffle Flowers A2 Layering Dies, Stampin' Up Something Fancy Dies, Poppy: Tear Drop Butterflies, Poppy Whittle Spinner Background, Stampin' Up ribbon, Stampin' Up Butterflies Thinlits Dies

Hello Stampers!  I made this card for two challenges over at Splitcoaststampers.  The first was the clean and simple challenge: butterflies or moths.  And the second one was the Free For All Challenge: Think Pink.  

For this card the die cuts were the star of the show.  I started by die cutting an A2 layer, the whittle spinner background, and the butterfly die cut.  I only adhered the body of the butterfly so the wings are folded up a bit.  I added a row of gems to the butterfly's body.  To finish the card I stamped a sentiment and added a ribbon treatment.  For the inside I stamped the sentiment and die cut it, and matted it.  And to finish the inside I die cut a couple butterflies and adhered them to the inside of the card.

That's all for now, thanks for stopping by!

Terri

Sunday, September 10, 2023

Black Cat Halloween


Supplies:
Stamps: Hero Arts: Halloween Message, Lawn Fawn: Spooktacular (inside)
Ink: Memento Tuxedo Black
Paper: Gina K White, Basic Black, Echo Park: Spider Webs
Accessories: Gina K Master Layouts 4, Spellbinders Wrought Iron, Stampin' Up Nested Essentials Dies, Cat Punch, Offray Ribbon

Hello Stampers!  I made this card for the Freshly Made Sketches challenge.  Here is the current sketch:
To start this card I picked out two patterned papers I wanted to use for the focal point, and adhered them together.  Next I die cut the wrought iron fence and adhered it to the focal panel.  Then I adhered the cat sitting on the wrought iron fence.  Next I added some ribbon between the two patterned papers.  For the sentiment I stamped and die cut the Happy Halloween and adhered it to the focal panel.  To finish the front I adhered this panel to the card base.  For the inside I adhered a strip of the spider web paper.  Then I stamped the sentiment and die cut it.  I adhered it to the inside and adhered the cat next to the sentiment.

That's all for now, thanks for stopping by!!!
Terri

Pink Truck


Supplies: 
Stamps: Stampin' Up Trucking Along
Paper: Gina K white, green from stash, Stampin' Up Daffodil Delight and Basic Black
Ink: Memento Tuxedo Black and Distress Ink: Tumbled Glass and Black Soot
Accessories: Stampin' Up Hey Chuck Dies, Pretty Pink Posh Sentiment Strips, Copic Markers, Pickett Fences Blending Brushes

Hello Stampers!  It is time for another Featured Stamper Challenge on Splitcoaststampers.  Here is the card I chose from her gallery to CASE:

For my card I changed the size to a square 4.25x4.25.  I colored my truck with Copic markers, and cut it out.  Then I cut a piece of white paper 3.25x3.25.  I blended on the tumbled glass for the sky.  Then I masked off the sky and blended on the black soot for the road.  Next I die cut the green hillside.  Then I matted it with some black cardstock.  To finish the sky I stamped and fussy cut out the clouds and die cut the sun.  Before I adhered the truck to the card, I stamped the shadow underneath the truck.  To finish the front I adhered the layers together and then adhered the sun in the corner.  For the inside I die cut the sun again and stamped and die cut the sentiment and adhered both of these to the inside of my card.

That's all for now!  Thanks for stopping by!
Terri  

Monday, September 4, 2023

Butterfly Wishes


Supplies: 
Stamps: Gina K Bitty Blossoms Mini (inside)
Paper: Gina K white and Better Press Cotton Card Panel Porcelain
Ink: Memento Tuxedo Black and Better Press French Blue, Cosmic Sky, and Mulberry
Accessories: Better Press System, Better Press Butterfly Swirl and It's Your Day Sentiment Strips, Spellbinders Pierced Mini Labels, Martha Stewart Butterfly Punch

Hello Stampers! I am sharing a card I made for the Clean and Simple Challenge on Splitcoaststampers: Butterflies or Moths.  For my card I decided to use my Butterfly Swirls Better Press plate.  I selected three inks and inked up the butterflies, and I ran it through my die cut machine.  I trimmed the focal panel so there was a border around it when I adhered it to my card base.  I had ran a bunch of the sentiment strips through the Better Press, so I could just pick one and use it on my card.  For the inside I stamped and die cut the sentiment and added a couple of butterflies.  Well that's all for now, back to work tomorrow!  Ugh.

Thanks for stopping by!
Terri


Sunday, September 3, 2023

Ribbon Wreath


Supplies:

Stamps: Simon Says Stamp: Christmas Blessings Set
Ink: Stampin' Up Cherry Cobbler and Lemon Lime Twist (inside)
Paper: Gina K White and Stampin' Up Cherry Cobbler
Accessories: Simon Says Stamp: Christmas Blessings Dies, LDRS Creative Quilted Plaid Die, Red Adhesive Gems, Offray Grosgrain ribbons, Silhouette Cameo Wreath (inside)

Hello Stampers!  It is Featured Stamper Sunday on Splitcoaststampers!  Today's Featured Stamper is Annette and this is the card that I CASED.
I was fascinated by the ribbon wreath on Annette's card, and saw that she included a video tutorial on it.  I had to try it.  I tried it with a couple of different ribbons, but the grosgrain was definitely the easiest for this ribbon treatment.   I added some red gems and a red bow to the wreath.  Now that the wreath was ready I had to decide what a was going to do for the card base.  I went with a cherry cobbler card base and die cut the quilted die in white.  I adhered the ribbon wreath with dimensionals.  I stamped and die cut the sentiment and adhered that with dimensionals also.  For the inside I die cut a wreath and bow and stamped a sentiment in the center.  

This was a fun card to make, thanks for stopping by!!
Terri

Saturday, September 2, 2023

Jack O Lantern


Supplies:
Stamps: Stampin' Up (inside)
Ink: Memento Tuxedo Black and Distress Inks: Speckled Egg, Walnut Stain, and Shabby Shutters
Paper: Gina K White, SSS Fog, Stampin' Up: Basic Black, Old Olive, Soft Suede, Early Espresso, Pumpkin Pie, and Mango Melody
Accessories: Sizzix Tim Holtz Edison, Colorize, Impression Obsession DIE178-C, Waffle Flower A2 and Additional A2 Layers Dies, Pickett Fence Blending Brushes, May Arts Twine, Inside: Martha Stewart Punch and Impression Obsession DIE060-1

Hello Stampers!!  I made it through the first three days of school.  Needless to say I am beat, and was grateful for some time this afternoon to get back into my craft room.  I made this card for two challenges:  Free 4 All: Fiber Friendly on Splitcoaststampers and Freshly Made Sketches.
To start my card I die cut and assembled the Jack O Lantern.  Isn't that Jack O Lantern the best?!  I knew I had to have it when I saw it released.  It is kinda big, but I think it worked out well with this sketch.  Then I had to decide what background I wanted.  I was just going to use Speckled Egg, but when I blended it out I didn't like it.  So I went over to Pinterest and found the blend Walnut Stain, Shabby Shutters, and Speckled Egg and gave that a try.  I liked it much better.  So next I matted the blended piece in black and adhered the Jack O lantern.  It needed a little somethin' somethin'.  I found a grass die and added to the focal panel.  The Edison die comes with such cool clouds and I wanted to incorporate them into my card also.  So I die cut a gray and a white one and adhered them to the focal panel.  Before I adhered the focal panel to the card base I wrapped some twine around the bottom portion to add that layer for the sketch.  For the inside I stamped the sentiment and added some clouds and another Jack O lantern with some smaller grass.  

I am almost done with my Halloween cards!! Yay!


Thanks so much for stopping by!!
Terri