Monday, August 26, 2024

You Rock


Supplies:
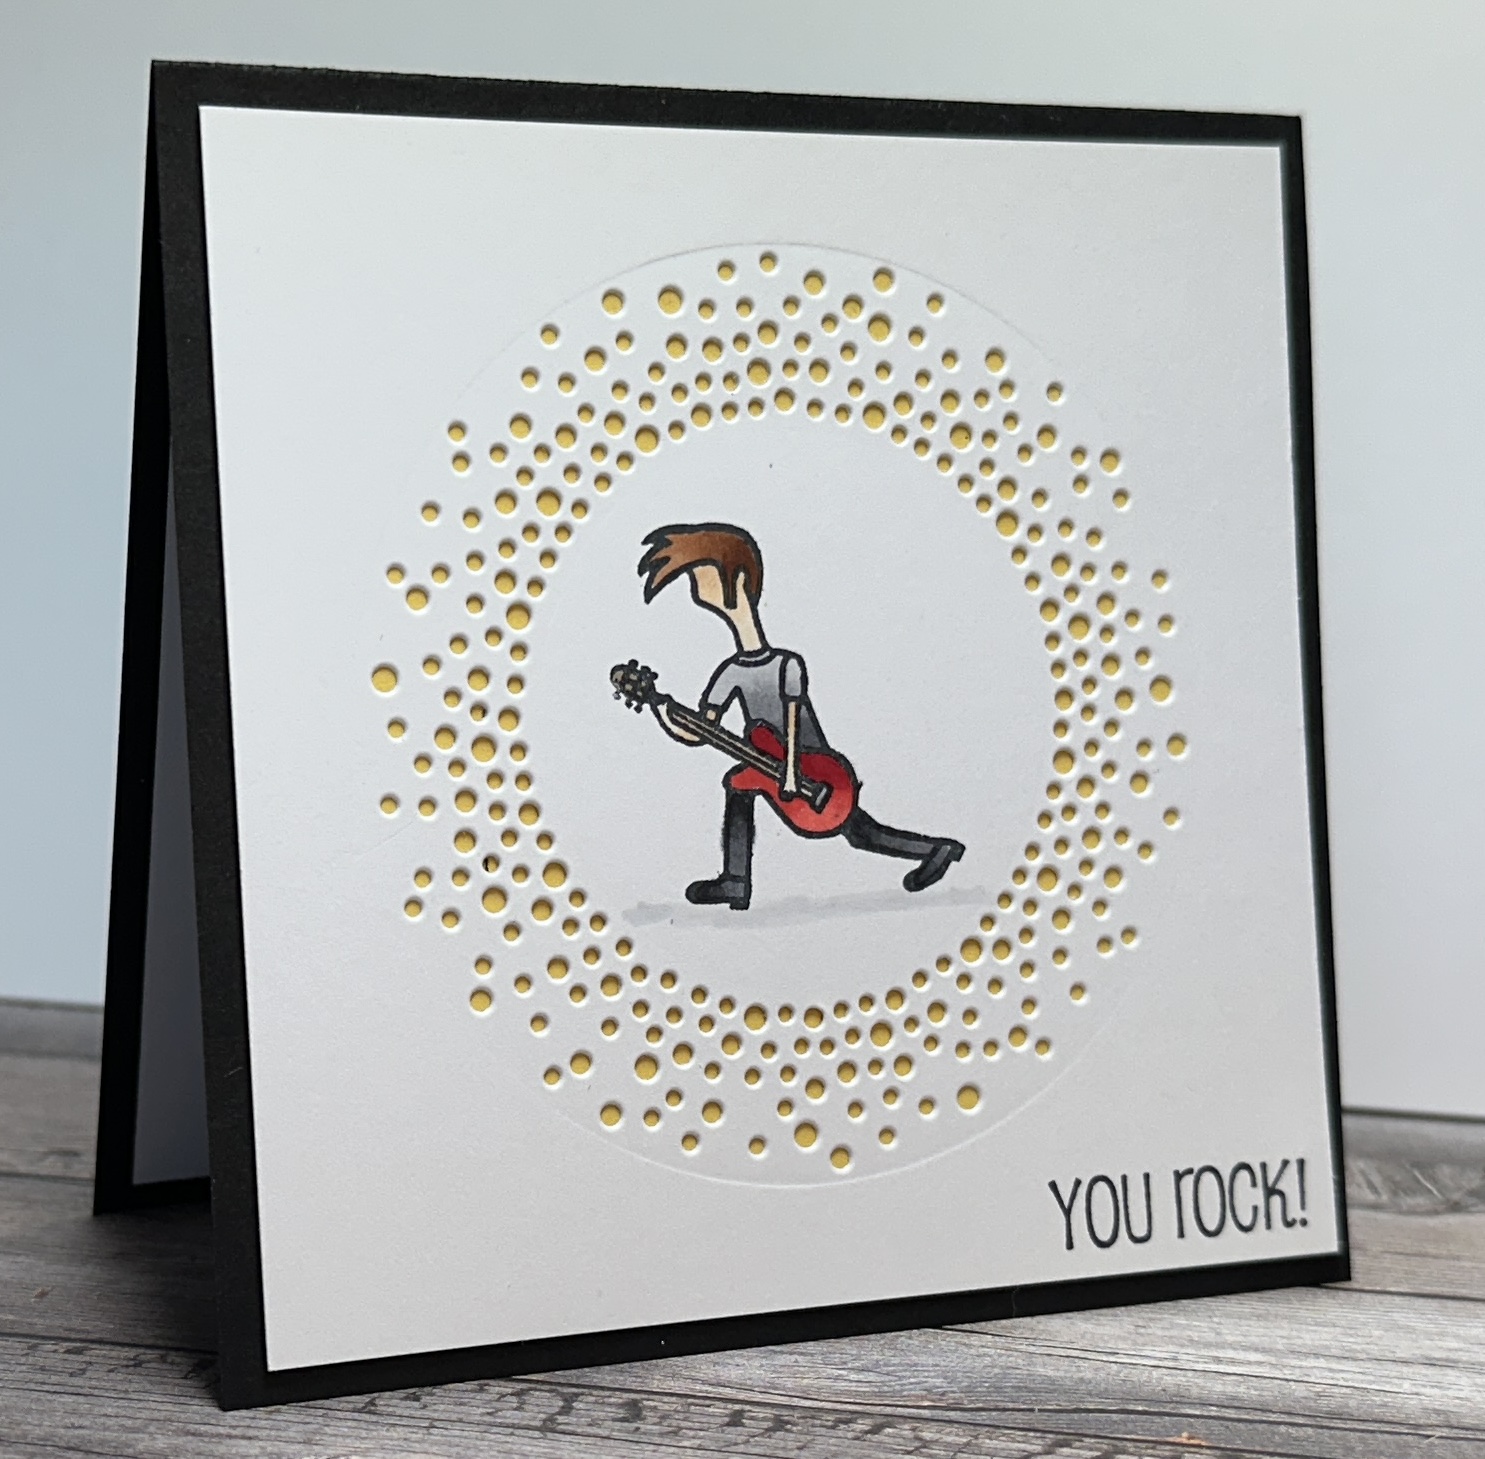
Stamps: Amuse: You Rock and Rock Star
Ink: Memento Tuxedo Black
Paper: Gina K White and SU Basic Black and Daffodil Delight
Accessories: SU Labels Aglow Dies, Copic Markers

Hello Stampers!  I have made a clean and simple masculine card for the Clean and Simple challenge over at Splitcoaststampers.  For my card I started by cutting a white panel 4x4.  Then I used the Labels Aglow to die cut the shine around this rock star.  Next I used my Stamp a ma Jig to stamp the rock star and sentiment, and I colored in the focal image with Copic markers.  To emphasize the shine around the rock star I added a piece of Daffodil Delight behind the white focal panel.  And to finish the card I adhered this piece to the card base.

That's all for now!  Thanks for stopping by!!
Terri

Sunday, August 25, 2024

Zinnia Birthday Wishes


Supplies:
Stamps: SU Zinnia and Peaceful Moments, Paper Trey Mega Mixed Messages
Ink: Memento Tuxedo Black
Paper: Gina K White and SU Basic Black
Accessories: Gina K Master Layouts 7, SU Forever Plaid Embossing Folder, Pink and Main Large Sentiment Strip Dies, SU Zinnia dies, Copic Markers

Hello Stampers!  I'm here to share a card that I made for the Featured Stamper Challenge over at Splitcoaststampers.  Here is a picture of my inspiration card:
For my card I started by die cutting the black mat and white focal panel using Master Layouts 7.  Then I embossed the white panel with the Forever Plaid embossing folder.  For the flowers I stamped, die cut, and colored them.  I adhered them to the plaid panel and trimmed off the over hang.  For the sentiment I stamped and die cut it and matted it in black to the left.  For the inside of the card I die cut again the black and white panels from the Master Layouts 7, and stamped a sentiment.

That's all for now!! Thanks so much for stopping by!!
Terri

Monday, August 19, 2024

Back to School


 Supplies:
Stamps: Back to School from my stash, SU School Lines
Paper: Gina K Kraft and White, SU Real Red, Pecan Pie, Old Olive
Ink: Memento Tuxedo Black, SU Real Red and Balmy Blue
Accessories: Papertrey Die, Cuttlebug Die, 1 1/4 Inch Scalloped Circle Punch, Spellbinders Circle Die

Hello Stampers!  The Clean and Simple Challenge over at Splitcoaststampers is: Back to School.  Today was my first day back to school and I had to participate in this challenge!  For my card I die cut the note pad paper and stamped the lines on in Balmy Blue.  I found the Cuttlebug stack of books die and thought it would be perfect for this card.  Then I added the sentiment.  I adhered this to a kraft card base.  

That's all for now!  Thanks for stopping by!
Terri

Sunday, August 18, 2024

Bird Day


Supplies:
Stamps: SU Bird's Eye View, Stamper's Anonymous Crazy Talk and Mini Bird Crazy and Things
Ink: Memento Tuxedo Black and VersaMark
Paper: Gina K White and SU Basic Black
Accessories: Gemini Happy Birthday Die, Simon Says Stamp Sentiment Labels Dies, SU Baker's Twine Crushed Curry, Copic Markers, Brutus Monroe Alabaster White Embossing Powder, Masking Paper 

Hello Stampers!  I'm here to share a card that I made for the Featured Stamper Challenge over at Splitcoaststampers.  Here is the card that I CASED:

For my card I started with the stamping.  I stamped the branch and masked it off to stamp the present and the bird.  Then I stamped the balloon.  Next I colored in the images using Copic markers.  For the balloon string I pierced a hole on the bird wing and in the balloon, and then added the baker's twine through these holes.  To finish the balloon I added a baker's twine bow.  Before I added the sentiment I trimmed down the focal panel to 3 7/8 x 3 7/8.  I added a black mat and adhered this to my card base.  For the sentiment I heat embossed it in white and cut up the words into strips using the sentiment dies.  For the inside I simply completed the sentiment with a large birthday die.

Well it's back to school for me tomorrow! UGH!  I'll be back to being a weekend stamper!  See you next weekend!!

Terri

Friday, August 16, 2024

Let it Snow


Supplies:
Stamps: SU One of the Kind, Falling Snow, Sophisticated Sled
Paper: Gina K White and Simon Says Stamp Matte Silver Cardstock
Ink: VersaMark
Accessories: SU ribbon, Brutus Monroe Alabaster White embossing powder, Ranger Silver embossing powder, SU Deckled Rectangle Dies, SU Stylish Shapes Dies, SU One of a Kind Dies, Honey Bee Gems, Dimensionals

Hello Stampers!  I made this card using the Freshly Made Sketches, sketch of the week!
I started by embossing the background stamp Falling Snow with silver embossing powder.  Then I die cut it with the A2 layering dies.  From here I worked on the snowflake.  I stamped, embossed, and die cut the large snowflake, and then I adhered a white snowflake that I die cut in the middle of the silver snowflake.  I added some bling to make it shine! :). Then I worked on the horizontal strip.  I used the deckled rectangle dies to create a deckle edge on the strip.  Then I added the white sheer ribbon with a silver edge.  I felt like something was missing.  I wanted to add a sentiment but I had never heat embossed on silver matte cardstock.   So I found a scrap and tried it out.  It worked!  I thought the silver cardstock might bubble up or something, but it didn't!  Yay!  So I stamped and embossed the Let it Snow sentiment.  To finish the card I adhered the layers together and popped up the snowflake with dimensionals.  For the inside I stamped, heat embossed, and die cut the sentiment.  I heat embossed some snowflakes to add some detail to the inside.  I wish the picture of this card showed it's subtle shine, but it was really hard to take a picture without having any glare.  I ended up putting it on the floor and holding an Ott Light above it as I took the picture!  LOL!  That's all for now!
Thanks so much for stopping by!
Terri

Monday, August 12, 2024

Let's Shell-ebrate


Supplies
Stamps: Whipper Snapper: Oreo and Friends, My Favorite Things: Too Cute Turtles, Sunny Studio: Turtley Awesome
Ink: Memento Tuxedo Black, VersaMark
Paper: Gina K White and SU Lemon Lime Twist
Accessories: Pink and Main Large Sentiment Strip Dies, SU Greetings of the Season Dies, SU Nested Essentials Dies, Lawn Fawn Quilted Backdrop Die, Brutus Monroe Alabaster White Embossing Powder, Copic Markers, Dimensionals, Waffle Flower A2 Dies

Hello Stampers!  I'm here to share a card that I made for the Clean and Simple Challenge: Turtles over at Splitcoaststampers!  I had to participate, I love turtles!  For my card I started by designing the tag.  I stamped, die cut, and colored the turtle and friends.  Then I stamped and die cut the sentiment, and adhered it to the bottom of my tag.  To finish the tag I added some lemon lime twist ribbon.  To finish the card I die cut the quilted backdrop and then die cut it with an A2 layer die to give a white border to the front of the card.   For the inside I added a layer of lemon lime twist and stamped and die cut the sentiment.  And that completes this card! :)
Thanks for stopping by!
Terri

Sunday, August 11, 2024

Zinnia Thinking of You


Supplies:
Stamps: SU Zinnia and Everyday Greetings
Paper: White and Basic Black
Ink: Memento Tuxedo Black
Accessories: SU Zinnia dies, SU Frosted Flurry Dies, SU Zinnia embossing folder, SU Gingham ribbon, Copic markers

Hello Stampers!  I'm here to share a card I made for the Featured Stamper Challenge over at Splitcoaststampers.  Here is the card that I CASED:
For my card I also started with a white card base.  Then I stamped, die cut, and colored in my zinnias.  To finish the zinnias I added a gingham bow.  Where she had two strips of patterned paper, I embossed a strip of white cardstock and matted it in black.  Instead of using a die cut sentiment, I stamped and die cut the Thinking of You sentiment.  For the inside I adhered an embossed panel to the top and left the rest blank to write a message.
That's all for now!  Thanks so much for stopping by! :)
Terri

Saturday, August 10, 2024

Joy!


 Supplies:
Stamps: Honey Bee Joy
Ink: Memento Tuxedo Black
Paper: Gina K White, Paper Studio Patterned Paper, SU Riding Hood Red
Accessories: Honey Bee Joy Dies, Simon Says Stamp: Big Joy Die, Concord & 9th Quilted Card Front Die, Honey Bee Winter Bouquets Honey Cuts, SU Beaded Pearls

Hello Stampers!  I'm here to share a card I made for the Freshly Made Sketches, sketch of the week.

For my card I started by cutting my card base.  Then I die cut the letters J and Y, and the poinsettia.  I lined them up and cut the white panel to go behind the word joy.  Before I added the word joy to the white panel I ran it through the die cut machine with the quilted card front die.  Next I cut a strip of the patterned paper to go behind the white panel.  To finish I adhered everything together.  For the inside I die cut he word joy, and then stamped the words to complete the sentiment.  I cut a piece of patterend paper to go behind the white panel like I did for the front.

That completes the card!  Thanks so much for stopping by!!
Terri

Wednesday, August 7, 2024

Snowman Wishes


Supplies:
Stamps: Lawn Fawn Merry Messages
Ink: Memento Tuxedo Black
Paper: Gina K White, SU Bermuda Bay, Basic Black, Real Red, Cherry Cobbler, Shaded Spruce, Pecan Pie, Bubble Bath, Pumpkin Pie
Accessories: Lawn Fawn: Mini Snowflakes Dies, Stiched Rectangle Dies, Build a Snowman Dies, Stitched Hillside Borders, SU Rectangle Stitched Framelits Dies, Snowflake Sky Embossing Folder

Hello Stampers!  I'm here to share a card I made for the Clean and Simple challenge over at Splitcoaststampers: Show Us Your Hats!  I decided to use a snowman image with a top hat.  I started by assembling the snowman.  Then I die cut the stitched rectangle for the focal panel.  For the snowy hill I die cut the same stitched rectangle and then die cut the stitched border as a base for the snowman.  I decided that the background needed something.  I decided to use a snowy embossing folder for the background.  I was arranging the pieces before adhering everything together, and I decided to add a sentiment to the front of the card.  I got out my Misti and stamped the sentiment in black.  To finish the front I adhered everything together.  For the inside I stamped and die cut the sentiment, and before adhering it to the inside I die cut and adhered some accent snowflakes.  And that completes the card.  

Thanks so much for stopping by!!
Terri

Sunday, August 4, 2024

Bright Birthday Wishes


Supplies:
Stamps: Clearly Besotted Sweet Little Sentiments and Honey Bee Birthday Wishes
Paper: Gina K White, SU Real Red, Old Olive, and Daffodil Delight
Ink:  Memento Tuxedo Black
Accessories: SU Hearts and Hugs Dies, Eyelet Embossing Folder, Stylish Shapes Dies, Scalloped Contours Dies, Honey Bee Gems, Dimensionals

Hello Stampers!  I'm here to share a card that I made for the Featured Stamper Challenge over at Splitcoaststampers.  Here is the card I CASED:

For my card I started with the focal panel, I die cut the scalloped rectangle.  Then I die cut the hearts.  For the flowers I die cut them and added a gem to the center of the flowers.  I stamped the sentiment, die cut it, and popped it up on the focal panel.  To finish the card I adhered the focal panel to the red layer that I had embossed, and then adhered it to the card base.  For the inside, I replicated the scalloped rectangle and hearts, and then added a sentiment.

Thanks so much for stopping by!!
Terri

Saturday, August 3, 2024

Spooky Wishes


Supplies:
Stamps: SU Playful Ghosts, Pretty Pink Posh: Ghost Friends
Paper: GKD White, American Crafts, SU Beautifully Penned DSP
Ink: Memento Tuxedo Black
Accessories: SU Spotlight on Nature Dies, Memory Box Ghastly Ghosts, Copic Markers

Hello Stampers!  I'm here to share a card I made for the sketch over at Freshly Made Sketches.
 
For my card I started by selecting the patterned papers.  The stripe and polka dots are from the Beautifully Penned DSP and the stars patterned paper I believe is from JoAnn.  I cut the pieces to create a background.  Then I stamped, die cut, and colored in my ghost.  I wanted to add more to the card, but I couldn't think of anything to add! So this is very clean and simple!!  For the inside I simply cut a piece of the star patterned paper, added a sentiment, and adhered some tiny ghosts to finish it off.
Thanks so much for stopping by!!
Terri