Showing posts with label christmas. Show all posts

Sunday, July 26, 2026

Cardinal Christmas Wishes


Supplies:
Stamps: Flourish Christmas, Stampin' Up Toile Christmas
Ink: Stampin' Up Basic Black
Paper: Gina K White, Stampin' Up Tidings of Christmas 6x6 DSP, Cherry Cobbler, Crumb Cake
Accessories: Stampin' Up Baker's Twine Essentials Pack, Dimensionals, Spellbinders Circle Dies, Heffy Doodle Scripty Merry Christmas Shadow Dies

Hello Stampers!  It is Featured Stamper Sunday!  I have missed a few these past couple of weeks.  This is the card that I CASED:
For my card I started with the focal image.  I stamped, die cut, and then colored my image with Copic markers.  I matted it with a cherry cobbler circle.  Next I cut a panel out of the DSP and matted it with cherry cobbler.  Then I wrapped some crumb cake bakers twine around that panel three times, and I adhered a double bow on it.  I adhered this panel to my crumb cake card base, and then popped up the cardinal with dimensionals.  To finish the front I die cut the sentiment and adhered it to the card base.  For the inside I replicated the same panel as the front and added a sentiment on a circle die cut matted with cherry cobbler. 

Thanks so much for stopping by!  
Terri

Saturday, July 18, 2026

Sweet Wishes


Supplies:
Stamps: Stampin' Up Sweet Candy Canes, Clearly Besotted Sweet Little Sentiments
Ink: Stampin' Up Poppy Parade and Lemon Lime Twist
Paper: Gina K White, Doodlebug Santa Express 6x6 paper pad, Stampin' Up Poppy Parade
Accessories: Doodle Twine Christmas Assortment, Pretty Pink Posh Sentiment Strip Dies, Waffle Flower Nesting Circles Dies, Stampin' Up Sweet Candy Cane Dies, Dotted Circles Embossing Folder

Hello Stampers!  I went for a bright candy cane card this time.  My favorite color is lime green, so I had to try one with lime green candy canes.  To start the card I found a circle die cut that would frame one of the circles in the dotted circles embossing folder.  After I die cut the cirlce I embossed it.  Then I found a circle die cut to mat it with poppy parade card stock.  Next I stamped and die cut the candy canes, and popped them up onto the circle.  I found some Doodle bug twine in my stash it is red and white with green glitter thread in it.  So I used that to embellish the candy canes.  For the sentiment I stamped, die cut, and adhered it to the circle.  I added dimensionals to each side and used tape runner in the middle to pop it up.  To finish the front I added a 4x4 inch square to a 4.25x4.25 card base.  For the inside I stamped the sentiment, die cut it, matted it in poppy parade, and adhered it to the inside of the card.

Thanks so much for stopping by!
Terri

Friday, July 17, 2026

Christmas Cheer


Supplies:
Stamps: Stampin' Up Sweet Candy Canes
Ink: Memento Tuxedo Black, Stampin' Up Poppy Parade, VersaMark
Paper: Gina K White, Stampin' Up Basic Black and Poppy Parade, Doodlebug Santa Express 6x6 Paper Pad
Accessories: Stampin' Up Sweet Candy Canes Dies, Black Gingham Ribbon, Wintry 3D Embossing Folder, Quickutz Label Die, Brutus Monroe Alabaster White Embossing Powder, May Arts Twine

Hello Stampers!  Another candy cane card here.  For this one I did get some inspiration from this card on Pinterest:

For my card I started by finding some swiss dot patterned paper.  From there I found some red cardstock and ink to match.  I stamped and die cut the candy canes.  Then I embossed the snowflakes on the white layer.  For the sentiment I heat embossed the sentiment and used the same ribbon as hers.  And then it was just a matter of adhering everything together.  When I was done I thought the candy canes needed a bow.  So I happened to have one on my desk from a different card and adhered it to the card.  For the inside I embossed a strip of white cardstock and matted it with poppy parade, and stamped the sentiment. 
Thanks for stopping by!
Terri
 

Shiny Candy Cane Card


Supplies:
Stamps: Stampin Up Holly Jolly, Holly Berry Happiness
Ink: Memento Tuxedo Black
Paper: Gina K White, Bazzill Red, Recollections 6x6 Peppermint Stripe Paper Pad
Accessories: Stampin' Up Sweet Candy Cane Dies, Scalloped Contours Dies, Jolly Holly Dies, Sounds of the Season Dies, May Arts Twine, Packaging Tape, and Copic Markers

Hello Stampers!  I made yet another card with the candy canes.  My Mom showed me how to use packaging tape to give the candy canes shine like a real candy cane.  Simply adhere packaging tape to the paper you are cutting out your candy cane from, and then die cut it.  Worked like a charm.  So then I went digging to look for a frame for the candy canes, and found the Scalloped Contours Dies.  They fit perfectly.  I embellished them with a twine bow and a silver jingle bell.  Then I need to create the base.  I cut out a red card base and then adhered a layer of the peppermint paper on top.  To finish the front I added my focal panel to the card base.  For the inside I stamped the sentiment, die cut it, and adhered it to the inside.  I embellished it with some holly.  I had made these to embellish the candy cane, but they didn't work out.
Thanks so much for stopping by!
Terri

Thursday, July 16, 2026

Vintage Candy Canes


Supplies:
Stamps: Stampin' Up Sweet Candy Canes, Clearly Besotted Sweet Little Sentiments
Ink: Gina K Kraft, Stampin' Up Real Red
Paper: Stampin' Up Cherry Cobbler, Very Vanilla, Authentique Christmastime 6x6 paper pad
Accessories: Stampin' Up Sweet Candy Canes Dies, Pretty Pink Posh Sentiment Strips Dies, May Arts Twine

Hello Stampers!  Yet another candy cane card!  For this one I used the sketch over at Freshly Made Sketches.
For my card I started by picking out some patterned paper.  After I cut it into a square layer, I inked up the edges to give it an even more distressed look.  Then I adhered it to my cherry cobbler card base.  Next I cut out a very vanilla square and inked up the edges as well, and matted it with cherry cobbler cardstock.  Next up were the candy canes.  I originally stamped them in cherry cobbler, but they were so dark being on the very vanilla cardstock they looked black.  So I tried it with real red ink and that was a closer match to the patterned paper.  So I stamped and die cut the candy canes, and then I inked up the edges of the candy canes as well to keep the distressed look.  I adhered them together, added a twine bow, and adhered them to the square.  For the sentiment I stamped, die cut, inked up the edges, and popped it up over the candy canes.  For the inside, I embellished it with some of the patterned paper and added a sentiment.  I inked up all of the edges to finish the inside.

Thanks so much for stopping by!
Terri
Wednesday, July 15, 2026

Candy Cane Wishes


Supplies:
Stamps: Stampin' Up Sweet Candy Canes
Paper: Gina K White, Stampin' Up Real Red and Garden Green
Ink: Memento Tuxedo Black, Stampin' Up Real Red & Garden Green
Accessories: Stampin' Up Sweet Candy Canes Dies and Stitched Real Red Ribbon, Poppy Scalloped Framer Tags, My Favorite Things Mini Scallop Rectangle STAX, Waffle Flower Additional A2 Layers Dies

Hello Stampers!  While I had this Candy Cane set out, I decided to make another card with it.  For this card I started with the tag.  I die cut the two layers and adhered them together.  Next I stamped and die cut the candy canes, adhered them to the tag, and added a bow.  To embellish the tag a bit more I stamped the greenery, die cut them, and adhered them to the back of the tag.  To finish the tag I tied on some of the stitched ribbon at the top of the tag.  For the background to this card I started with a Real Red card base.  Next I die cut to A2 layers, one of which I die cut using the background die.  I adhered these two layers together and then adhered them to the red card base.  For the inside I stamped and die cut the sentiment, and adhered it to the scalloped mat.  I stamped and die cut more of the greenery to adhere behind the sentiment.  And that completes this card! :)

Thanks so much for stopping by!
Terri

Monday, July 13, 2026

Candy Cane Wishes


 Supplies:
Stamps: Stampin' Up Sweet Candy Canes
Paper: Gina K White, Stampin' Up Real Red, Simon Says Stamp Matte Silver
Ink: Memento Tuxedo Black and Stampin' Up Real Red
Accessories: Stampin' Up Sweet Candy Canes Dies, Seasonal Cheer Mini Embossing Folder, Sounds of the Season Dies, May Arts Twine, Waffle Flower Additional A2 Layers Die

Hello Stampers!  I'm here to share a card I made for the Clean and Simple Challenge over at Splitcoaststampers.  The challenge was to use something on your desk.  I happened to have the Sweet Candy Canes set on my desk, because I am borrowing it from my Mom.  For my card I stamped and die cut the candy canes.  I embellished the candy canes with dies from the Sounds of Seasons set and a bow from May Arts twine.  I popped this up onto a white layer and matted the white layer with real red cardstock.  Behind the focal image I have two strips of real red cardstock that I embossed and inked up with white craft ink so you could see the candy canes. I arranged and adhered the pieces to the card, and then stamped the senitment.  For the inside I hand a strip of the embossed candy cane cardstock, so I adhered that inside with a sentiment.  And that completes my card.  Thanks so much for stopping by!
Terri

Sunday, March 8, 2026

Cardinal Christmas


Supplies:
Stamps: Flourishes Christmas Classics
Paper: Gina K White and Stampin' Up: Tidings of Christmas 6x6 DSP, Crumb Cake, Cherry Cobbler, and Evening Evergreen
Ink: Memento Tuxedo Black
Accessories: EK Success Tag Punch, Copic Markers, Stampin' Up Twine and Dimensionals, Spellbinders Circles dies

Hello Stampers!  It is Featured Stamper Sunday over at Splitcoaststampers!  Here is my inspiration card:
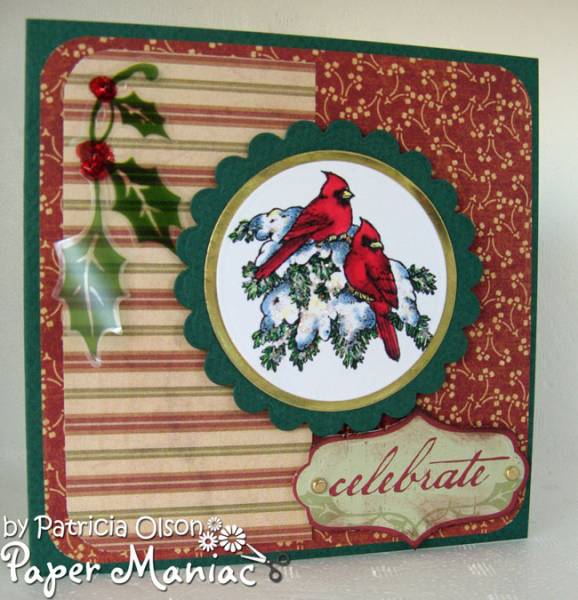
For my card I used a cardinal image as well and colored it in with Copic markers.  I die cut and embossed the focal image with a Spellbinders circle die.  Then I die cut a cherry cobbler frame for the focal image.  Next I picked out some patterned paper and matted it with cherry cobbler cardstock.  I added some twine and stamped and punched out the sentiment with a tag punch.  I did have to trim off the bottom of the tag as it was too long for the sentiment.  To finish the front of the card, I simply adhered the pieces to the card base.  For the inside I cut a piece of the patterned paper and matted it in evening evergreen.  Then I stamped and die cut the sentiment and matted it in cherry cobbler cardstock.  

That's all for now!  Thanks for stopping by!

Terri

Sunday, March 1, 2026

May Your Days Be Merry


Supplies:
Stamps: Stampin' Up Decorative Trees
Paper: Stampin' Up Very Vanilla and Mossy Meadow, Authentique 6x6 Tradition Paper Pad
Ink: Stampin' Up Soft Suede and Mossy Meadow
Accessories: Stampin' Up Decorative Trees Dies, Dimensionals, Nested Essentials Dies, May Arts Twine, Park Lane Gold Gem

Hello Stampers!  I'm ending my long weekend with some laundry and cardmaking!  I made this one for the Featured Stamper Challenge over at Splitcoaststampers.  Here is the card I CASED:

For my card I started by selecting some patterned paper for the background, and to get a color scheme established.  Next I cut the card base and layers.  For the tree I stamped and die cut it, and added a die cut star with a gold gem on it.  I cut a very vanilla piece of card stock and stamped a sentiment at the bottom, adhered the tree, and added some twine.  Then to finish the front I popped up the focal image.  For the inside I stamped the sentiment and border, and then die cut it.  I added a strip of patterned paper and adhered the sentiment to it.  And that completes my card.  Thanks so much for stopping by!
Terri


Sunday, February 1, 2026

Warm Winter Wishes


Supplies:
Stamps: Gina K Sweaters and Cocoa and Christmas Greenery
Paper: Gina K White and SU Secret Sea
Ink: SU Secret Sea
Accessories: SU Snowflake Kisses Dies, Honey Bee Gems

Hello Stampers!  It is Featured Stamper Sunday over at Splitcoaststampers.  Here is my inspiration card: 
For my card I started by cutting a panel 4x5.25 of secret sea cardstock.  Then I die cut the snowflakes from the snowflake kisses die on each corner.  Next I stamped the sentiment in secret sea ink and die cut it with the circle from snowflake kisses die.  I popped up the circle in the center of the card.  After this I adhered this layer to a white card base.  To finish the front I added some gems to the center of the snowflakes.  For the inside I stamped the sentiment in secret sea ink and die cut some snowflakes from secret sea cardstock and adhered them next to the sentiment.

Thanks so much for stopping by!!
Terri

Sunday, January 18, 2026

Peaceful on Earth


Supplies:
Stamps: Stampin' Up Peace on Earth and Brightest Glow
Paper: Stampin' Up Misty Moonlight 2 Tone Cardstock, Simon Says Stamp Matte Silver Cardstock, Gina K White
Ink: Memento Tuxedo Black
Accessories: Stampin' Up Misty Moonlight Ribbon, Peace on Earth Dies, Peaceful Greenery Embossing Folder

Hello Stampers!  Guess what!!!  I found my embossing folder.  It turns out that when I ran it through my die cut machine it warped my folder a bit.  So I put it under something heavy to see if it would flatten out!  So since I found it I just had to use it!!  I started out by embossing a layer on the misty moonlight 2 tone cardstock.  Then I sanded the embossed image to bring the white through.  I next added the ribbon.  For the sentiment I stamped it to the right side of the die cut so there would be room for the dove.  I adhered the sentiment with dimensionals and then popped up a silver dove as well.  Lastly I adhered this to the white card base.  For the inside I used the same label dies and stamped the sentiment and matted it.  I also adhered a silver dove to the inside as well.  

That's all for now!  Thanks for stopping by!!

Terri

Sunday, January 11, 2026

Hedgehog Christmas Greetings


Supplies:
Stamps: Stampin' Up Best of Snow and Sweet n Sassy: Holiday Cheer
Ink: Memento Tuxedo Black and Stampin' Up Real Red
Paper: Stampin' Up Real Red, Take a Bow 6x6 DSP, and Gina K White
Accessories: Stampin' Up Stitched Square Dies, Real Red Ribbon, Dimensionals, Gina K Mini Snowflakes, Lawn Fawn Stitched Hillside Borders, Copic Markers

Hello Stampers!  Have you ever misplaced one of your craft supplies?  I had an idea for the featured stamper challenge today and I could not find the embossing folder I wanted to use.  I looked EVERYWHERE!  I spent at least an hour looking in places where I thought it might be and no luck.  I'm so frustrated, I still haven't found it.  I'm sure I'll find it when I am least expecting to.  Needless to say I went a different route for my card design today.  Here is the card from the Featured Stamper Challenge over at Splitcoaststampers.

For my card I started by stamping my focal image and die cutting it.  Then I used the Lawn Fawn border dies to ground my images.  After this I colored in my image with Copic markers, and glued on some mini snowflakes.  I matted the focal image in red.  From here I picked out some DSP and cut it out, and added a ribbon.  I adhered this layer to my 4.25x4.25 card base.  Then to finish the card I popped up my focal image in the center.  I kept the inside simple today.

That's all for now, thanks so much for stopping by!!
Terri

Saturday, January 3, 2026

Gingerbread Coffee


Supplies: 
Stamps: Whipper Snapper: Winter Coffee
Ink: Memento Tuxedo Black
Paper: Gina K White and Kraft, HOTP Christmas Plaid, The PaperCut Wild Cherry
Accessories: Copic Markers, Gina K Rectangle Dies

Hello Stampers!  I'm back with one last card using the Whipper Snapper Winter Coffee Set.  Which do you like the best?  I can't decide!  LOL!  Here is the link to the first one I made with all of the details.  Check it out!

Thanks so much for stopping by!
Terri

Snowman Coffee


Supplies:
Stamps: Whipper Snapper: Winter Coffee
Ink: Memento Tuxedo Black
Paper: Gina K White, Colormates Medium Awesome Aqua, Lawn Fawn Perfectly Plaid 6x6 Paper Pad
Accessories: Copics, Gina K Rectangle Dies

Hello Stampers!  I'm here to share a card I made using the Winter Coffee stamp set again.  This time I used the snowman from the set to decorate my coffee.  Here's a link to the Santa that I used and it includes all of the details in making this card.  

Thanks for stopping by!
Terri

Monday, December 29, 2025

Sleigh Ride


Supplies:
Stamps: Stampin' Up Little Treats, Altenew: Believe
Ink: Memento Tuxedo Black and SU Cherry Cobbler
Paper: SU Tidings of Christmas 6x6 DSP, SU Cherry Cobbler, Gina K White
Accessories: Pretty Pink Posh: Sentiment Strips Dies, SU Giving Gifts Dies, SU Snowflake Sky Embossing Folder

Hello Stampers!  I'm here to share a card I made using the sketch over at Freshly Made Sketches.  Here is the sketch:
For my card I started with the Santa die cut.  First I cut out a piece of cherry cobbler cardstock, and then ran it through the die cut machine leaving an even border around the Santa.  Next I cut a piece of the snowflake paper slightly smaller than my cherry cobbler rectangle, and adhered the Santa to it.  Then I went on a hunt for a sentiment that would fit the space.  I found this Merry Christmas, stamped it and die cut it.  Next I cut the background layer and embossed it with the snowflake sky embossing folder, and matted it in cherry cobbler.  Then all I had to do was adhere everything down onto the white card base.  For the inside I stamped my sentiment and added some stars.  

Thanks so much for stopping by!!  
Terri

Sunday, December 28, 2025

Caffeine Holiday Greetings


Supplies:
Stamps: Whipper Snapper: Winter Coffee
Paper: Gina K White, SU Real Read and Basic Black, Recollections: Christmas Plaid 6x6 paper pad
Ink: Memento Tuxedo Black
Accessories: Gina K large and small rectangle dies, Copic Markers

Hello Stampers!  I hope you all had a wonderful holiday!  It is a dreary rainy turning into snowy day.  So it is a great day to hang out in the craft room!  I bought this Whipper Snapper set recently and didn't get a chance to use it.  The Featured Stamper Challenge gave me some inspiration to use it.  Here is the card I am CASEing:
I started with the focal image for this card, I stamped, die cut, and colored in the image.  Then I matted it in black.  The original card used a plaid patterned paper, so I found a plaid patterned paper to use on mine as well and matted it in black.  Then I adhered it to a red card base.  For the inside I stamped a sentiment, die cut it, and then matted it in black to finish the card.  Definitely a quick and easy card, but as always takes me forever to complete it. LOL!

Thanks for stopping by!
Terri 

Sunday, December 14, 2025

Reindeer Fun


Supplies:
Stamps: Stampin' Up Brightest Glow
Paper: GKD White, Stampin' Up: Crumb Cake, Early Espresso, Soft Suede, Real Red
Ink: Memento Tuxedo Black
Accessories: Stampin' Up Reindeer Fun Dies, Snowflake Sky Embossing Folder, Copic Markers, Silver gel pen

Hello Stampers!  Long time, no stamp!  Tis the season to be busy!  I saw the

sketch of the week over at Freshly Made Sketches, and I thought of this die right away.  To start my card I cut my card base and layers.  Then I die cut the evergreen circle out of the top layer.  Next I cut a layer slightly smaller than the top layer and embossed it with the snowflake sky embossing folder.  I adhered this to the back of the front layer.  After this I assembled Rudolph and tucked him in the bottom of the evergreen circle.  Then I die cut the Christmas lights in white and used my copic markers to color them red, and I used a silver pen to add detail to the top of the lights.  I adhered this to the bottom of the evergreen circle.  Next I stamped the sentiment, die cut the banner, and adhered it to the card.  For the inside I stamped the sentiment and embellished it with the same string of lights from the front.

That's all for now!!  Have a great week!!

Terri

Wednesday, August 13, 2025

For You and Yours


Supplies:
Stamps:  Stampin' Up Winter Scenes and Brightest Glow
Ink: VersaMark    
Paper: Gina K White and Simon Says Stamp Matte Silver Cardstock  
Accessories: Stampin' Up Peaceful Greenery Embossing Folder, Pink and Main Large Sentiment Strip Dies, Stampin' Up Peace on Earth Dies, Stampin' Up Thoughtful Expressions Dies, Silver Embossing Powder, Dimensionals

Hello Stampers!  I'm here to share a card I made for the sketch over at 
Freshly Made Sketches
.
For my card I started with the card base.  From there I added a silver layer, and then cut and embossed a white layer.  Next I die cut the silver decorative shape and nestled it into the embossing folder.  For the focal image I stamped, heat embossed, and die cut it.  I adhered it to the silver shape.  For the sentiment I stamped, heat embossed, and die cut it.  I added a bit of silver on the edges of the sentiment strip, and then I popped this up with dimensionals.  For the inside I simply heat embossed and die cut it.

Thanks so much for stopping by!
Terri

Tuesday, August 12, 2025

Happy Holidays


Supplies:
Stamps: SU Brightest Glow
Ink: SU Evening Evergreen
Paper: Gina K White, SU Evening Evergreen, SU 6x6 One Horse Open Sleigh
Accessories: Pretty Pink Posh Sentiment Strips Die, SU Labels Aglow Dies, SU Evening Evergreen Plaid Ribbon, Gina K Mini Snowflakes

Hello Stampers!!  I'm here to share a Christmas card that I made using the One Horse Open Sleigh DSP.  I followed a tutorial but made mine an A2 size card instead of a 5x7 card.  Here is the video tutorial I was inspired by.  Making a 4 Panel Card.  I made into an A2 card, here are the measurements if you want to try it.  Cut your patterned paper to 4 3/8 x 3 5/8, and cut the four panels by cutting every 1 1/8 inches.  To mat this cut a piece of cardstock 4 15/16 x 3 3/4 inches.  This was a fun card to make and a great way to use your patterned paper!!  

Thanks so much for stopping by!!
Terri

Friday, August 8, 2025

Happy Holidays!


Supplies:
Stamps: Stampin' Up Brightest Glow
Paper: Stampin' Up:  One Horse Open Sleigh 6x6 DSP, Basic White, Crumb Cake, and Cajun Craze
Ink: Stampin' Up Cajun Craze
Accessories: Pretty Pink Posh: Large Sentiment Dies, Stampin' Up Linen Thread and Dimensionals

Hello Stampers!  I'm here to share a Christmas card that I made using a fun Book Fold tutorial that I found on Pinterest.  Here is what her card looked like:

I used a different piece of DSP for my card.  My sister-in-law loves foxes, and this card was made with her in mind.  Check out the tutorial, it is an easy fun fold card! :)

Thanks so much for stopping by!
Terri