Showing posts with label Copic coloring. Show all posts

Sunday, July 26, 2026

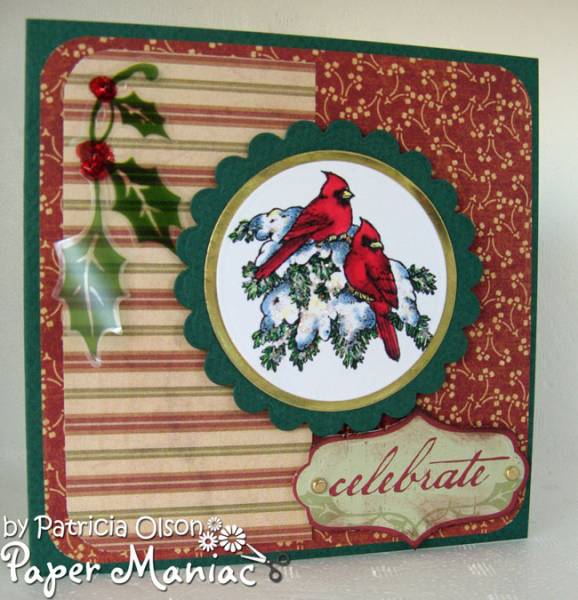
Cardinal Christmas Wishes


Supplies:
Stamps: Flourish Christmas, Stampin' Up Toile Christmas
Ink: Stampin' Up Basic Black
Paper: Gina K White, Stampin' Up Tidings of Christmas 6x6 DSP, Cherry Cobbler, Crumb Cake
Accessories: Stampin' Up Baker's Twine Essentials Pack, Dimensionals, Spellbinders Circle Dies, Heffy Doodle Scripty Merry Christmas Shadow Dies

Hello Stampers!  It is Featured Stamper Sunday!  I have missed a few these past couple of weeks.  This is the card that I CASED:
For my card I started with the focal image.  I stamped, die cut, and then colored my image with Copic markers.  I matted it with a cherry cobbler circle.  Next I cut a panel out of the DSP and matted it with cherry cobbler.  Then I wrapped some crumb cake bakers twine around that panel three times, and I adhered a double bow on it.  I adhered this panel to my crumb cake card base, and then popped up the cardinal with dimensionals.  To finish the front I die cut the sentiment and adhered it to the card base.  For the inside I replicated the same panel as the front and added a sentiment on a circle die cut matted with cherry cobbler. 

Thanks so much for stopping by!  
Terri

Thursday, June 4, 2026

Taco Birthday


Supplies:
Stamps: Lawn Fawn Year Nine
Paper: Gina K White and Stampin' Up Poppy Parade

Ink: Memento Tuxedo Black and Distress Inks: Barn Door, Broken China, and Mustard Seed
Accessories: Lawn Fawn Year Nine Dies, EK Success 1 3/4 inch circle punch, Pickett Fence Blending Brushes, Copic markers, Gelly Roll White Gel Pen, Lawn Fawn Stitched Scalloped Borders

Hello Stampers!  I made it!  Our last day of school was last Friday!!  I squeezed in some crafty time yesterday.  I made this using the sketch from Freshly Made Sketches:

For my card I started with the tacos. I stamped, die cut, and then colored in the tacos.  Then I punched out three circles and ink blended the bottom portions of the circles.  Then I used the same distress inks and inked up the confetti stamp to create a background for the tacos. Next I cut a strip of white card stock and stamped the sentiment.  To cover my seam in the card I die cut the stitched scallop border.  Then I just adhered everything to my card front.  For the inside I stamped the confetti background and added stitched scallop border.  I also had an extra taco so I adhered him in there also! :)

Thanks so much for stopping by!!  I am headed up north tomorrow, but when I'm back I am looking forward to sharing my cards!! :)
Terri

Sunday, April 5, 2026

Happy Birthday


 Supplies:
Stamps: Stampin' Up: Mixed Florals and Circle Sayings, Julie Hickey Sweet Sentiments
Paper: Gina K White, Stampin' Up Old Olive and Highland Heather
Ink: Memento Tuxedo Black, Stampin' Up Highland Heather, and Distress Ink Antique Linen
Accessories: Stampin' Up Brushed Brass Butterflies, Tasteful Labels Die, Mixed Florals Dies, Distressed Tile Embossing Folder, Linen Thread, Waffle Flower Nesting Circles Dies, Copics Markers

Hello Stampers!  Happy Easter to all!  I'm here to share a card I made for the Featured Stamper Challenge over at Splitcoaststampers.  Here is my inspiration card:

I started with the embossed layer.  I inked up my embossing folder with antique linen ink, and ran it through the die cut machine.  I wanted a little more ink on it, so I gently added some on using the ink cube to paper.  Then I tore the paper just like the inspiration card.  Next I stamped, die cut, and colored in the focal image.  From here I worked on the sentiment.  I stamped and die cut the sentiment, and then die cut a highland heather mat.  Instead of a ribbon I used some linen thread for my ribbon treatment.  Next I cut a strip of highland heather and adhered it to the embossed layer.  From here I popped up the sentiment and adhered the florals.  To finish the card I added some brushed brass butterflies.  For the inside I stamped the sentiment, some ladybugs, and a leafy image.  I colored these in and that completed my card.
And that completes my card.  Thanks so much for stopping by!
Terri

Sunday, March 22, 2026

Happy Birthday


Supplies:
Stamps: Stampin' Up Mixed Florals, Simon Says Stamp Sunflower Dance, Honey Bee Birthday Wishes
Ink: Memento Tuxedo Black
Paper: Gina K White, Stampin' Up Daffodil Delight and Floral Delight 12x12 DSP
Accessories: Simon Says Stamp Sunflower Dance Dies, Copic Markers, Honey Bee Gems

Hello Stampers!  It is Featured Stamper Sunday over at Splitcoaststampers.  Here is the card I CASED:
For my card I started by finding a patterned paper.  I used the same packet of DSP as the featured stamper, but I used a different pattern.  Then I worked on the focal panel.  I stamped the floral image and sentiment, and colored in the floral image with Copic markers.  Then to embellish the floral image I added some gems and stamped, die cut, colored in the butterflies and popped them up on the focal panel.  From here I simply adhered everything to the card base.  For the inside I stamped the sentiment, matted it with daffodil delight, and added some of the DSP to the top.
That's all for now!  Thanks for stopping by!
Terri

Monday, March 16, 2026

Happy Birthday


Supplies:
Stamps: Simon Says Stamp Friend Like You, Papertrey Ink inside sentiment, Gina K Woodland Friends
Paper: Gina K White, Stampin' Up Garden Green, Brown from Stash
Ink: Memento Tuxedo Black, Distress Ink Tumbled Glass
Accessories: Pickett Fence Blending Brush, Cheery Lynn Designs: Mini Fanciful Flourish, Poppy Stamps Whittle Cloud Dies, Pretty Pink Posh Sentiment Strips Dies, Hero Arts Wood Frames Infinity Dies, Copic Markers

Hello Stampers!  I got a bonus day off today due to the blizzard we are having right now!  So I took my cup of coffee into my craft room and got to work.  This card is for two challenges.  One being the Clean and Simple Challenge over at Splitcoaststampers: Timber.  And the other challenge is using the sketch over at Freshly Made Sketches.
For my card I started with the frame.  I die cut the wood grain frame, and then die cut a white panel for the inside of the frame.  I stamped my focal image onto this white panel and colored it in with Copic markers.  Next I framed the "arch" by blending Tumbled Glass ink onto the top portion of the white panel.  To the sky I die cut some whittle clouds and adhered them onto the ink blended sky. For the sentiment I stamped and die cut it with a sentiment strip die.  Then I was stuck.  I wasn't sure what to do with the sprigs that are on the sketch.  I tried grass, but that didn't look right.  So I went through my dies and found a flourish die.  It had similar leaves as the focal image, so I die cut two flourishes and cut them apart.  I adhered them flourishes to the card base and then popped up the sentiment.  I kept the inside of the card simple by die cutting a wood grain frame and stamping a sentiment.

Thanks so much for stopping by!!
Terri

Sunday, March 8, 2026

Cardinal Christmas


Supplies:
Stamps: Flourishes Christmas Classics
Paper: Gina K White and Stampin' Up: Tidings of Christmas 6x6 DSP, Crumb Cake, Cherry Cobbler, and Evening Evergreen
Ink: Memento Tuxedo Black
Accessories: EK Success Tag Punch, Copic Markers, Stampin' Up Twine and Dimensionals, Spellbinders Circles dies

Hello Stampers!  It is Featured Stamper Sunday over at Splitcoaststampers!  Here is my inspiration card:
For my card I used a cardinal image as well and colored it in with Copic markers.  I die cut and embossed the focal image with a Spellbinders circle die.  Then I die cut a cherry cobbler frame for the focal image.  Next I picked out some patterned paper and matted it with cherry cobbler cardstock.  I added some twine and stamped and punched out the sentiment with a tag punch.  I did have to trim off the bottom of the tag as it was too long for the sentiment.  To finish the front of the card, I simply adhered the pieces to the card base.  For the inside I cut a piece of the patterned paper and matted it in evening evergreen.  Then I stamped and die cut the sentiment and matted it in cherry cobbler cardstock.  

That's all for now!  Thanks for stopping by!

Terri

Sunday, February 15, 2026

Best Year Yet


Supplies:
Stamps: Stampin' Up Bird's Eye View and Best Year
Paper: Gina K White, Stampin' Up Night of Navy and Take to the Sky 12x12 DSP
Ink: Memento Tuxedo Black
Accessories: Copic Markers, Waffle Flower Additional Circles Dies, May Arts Twine, Stampin' Up Stylish Shapes Dies

Hello Stampers!  I'm here to share a card a made for the Featured Stamper Challenge over at Splitcoaststampers.  Here is my inspiration card:
For my card I started with the focal image.  I stamped, die cut, and colored in the image. Next I stamped and die cut the sentiment.  I cut out a piece of DSP that coordinated with the focal image.  To that I adhered the sentiment and the night of navy circle mat.  I wrapped some twine around the DSP three times.  Then I popped up the focal image onto the night of navy circle.  To finish the card I adhered this to the card base.  For the inside I added some DSP and a sentiment, and that completed my card.

Thanks so much for stopping by!!
Terri

Sunday, January 25, 2026

Happy Birthday


Supplies:
Stamps: Stampin' Up Thankful Garden, Charming Day, and Elements of Text, PaperTrey Birthday Basics
Paper: Gina K White, Stampin' Up Petal Pink, Sahara Sand
Ink: Memento Tuxedo Black and Stampin' Up Sahara Sand and Early Espresso
Accessories: Honey Bee Gems, Copic Markers, Martha Stewart Ribbon, Tim Holtz Linen Layering Stencil

Hello Stampers!  I spent the day cooking yesterday, I made a big pot of chili for the week ahead.  So no card making yesterday.  I do have the get the laundry done today, so I spent my morning making this card for the Featured Stamper Challenge over at Splitcoaststampers.  Here is the card I CASED: 

For my card I started with the floral image.  I stamped, die cut, and then colored it in with copics.  Then I worked on the Sahara Sand layer.  First I ink blended the edges of the layer with a blending brush.  Then I stamped some script using the Elements of Text set.  Next I used a stencil to add some texture to the layer.  From here I laid out the ribbon to where it would be, and then I stamped my sentiment.  Then I adhered the ribbon to the layer. To finish this layer I adhered the flower and some gems.  For the inside I partially stamped the floral image and colored it in, and added a sentiment.

That's all for now!  Thanks for stopping by!
Terri

Sunday, January 18, 2026

Wish


Supplies:
Stamps: Whipper Snapper: Garden Buzz, PaperTrey Mixed Messages and Birthday Basics
Paper: Stampin' Up Melon Mambo and Gina K White
Ink: Memento Tuxedo Black
Accessories: Stampin' Up Layering Circles Framelits, Linen Thread, Dimensionals, Copic markers, Waffle Flower: Additional Circles Die and Meandering Texture Die, Sizzix Thinlits Tim Holtz 665926

Hello Stampers!  It is Featured Stamper Sunday!  Here is the card I CASED:

For my card I started with the focal image.  I stamped, colored, and die cut it.  I added some linen thread and attached a small tag that I had stamped and die cut.  Then I popped it up on a melon mambo scalloped circle.  Next I die cut the meandering texture die.  I adhered this layer to the card base, and then adhered the focal image to the meandering layer.  For the inside I stamped and colored a partial stamped image.  Then added a sentiment.

This was a quick and easy one!  Thanks for stopping by!
Terri

Sunday, January 11, 2026

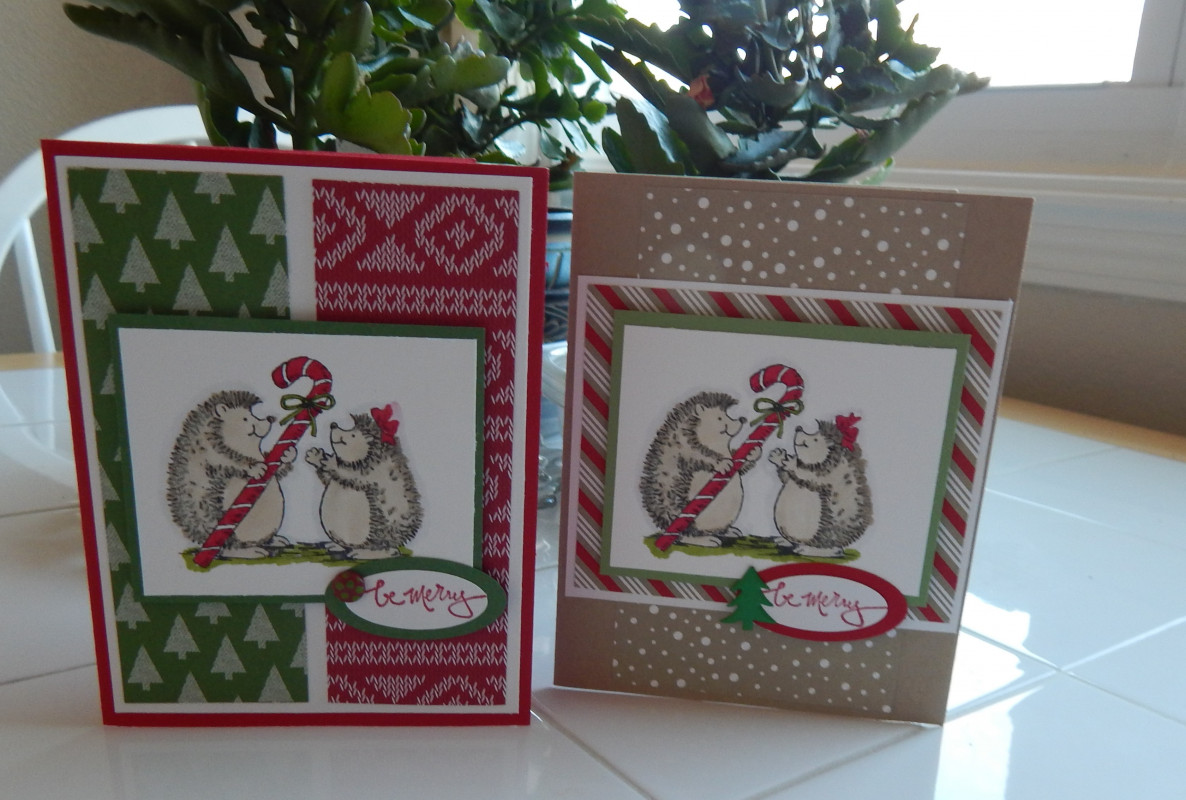
Hedgehog Christmas Greetings


Supplies:
Stamps: Stampin' Up Best of Snow and Sweet n Sassy: Holiday Cheer
Ink: Memento Tuxedo Black and Stampin' Up Real Red
Paper: Stampin' Up Real Red, Take a Bow 6x6 DSP, and Gina K White
Accessories: Stampin' Up Stitched Square Dies, Real Red Ribbon, Dimensionals, Gina K Mini Snowflakes, Lawn Fawn Stitched Hillside Borders, Copic Markers

Hello Stampers!  Have you ever misplaced one of your craft supplies?  I had an idea for the featured stamper challenge today and I could not find the embossing folder I wanted to use.  I looked EVERYWHERE!  I spent at least an hour looking in places where I thought it might be and no luck.  I'm so frustrated, I still haven't found it.  I'm sure I'll find it when I am least expecting to.  Needless to say I went a different route for my card design today.  Here is the card from the Featured Stamper Challenge over at Splitcoaststampers.

For my card I started by stamping my focal image and die cutting it.  Then I used the Lawn Fawn border dies to ground my images.  After this I colored in my image with Copic markers, and glued on some mini snowflakes.  I matted the focal image in red.  From here I picked out some DSP and cut it out, and added a ribbon.  I adhered this layer to my 4.25x4.25 card base.  Then to finish the card I popped up my focal image in the center.  I kept the inside simple today.

That's all for now, thanks so much for stopping by!!
Terri

Sunday, January 4, 2026

Trio of Flowers


Supplies:
Stamps: SU Both Way Blossoms and Honey Bee Birthday Wishes
Paper: Gina K White, SU Basic Black, Simple Stories Love & Adore 6x6 Paper Pad
Ink: Memento Tuxedo Black
Accessories: Honey Bee Gems, Copic Markers, SU Rectangle Stitched Framelits Dies, Dimensionals

Hello Stampers!  It's my last day of freedom, I go back to school tomorrow.  So I had to make a card today.  I made this card for the Featured Stamper Challenge over at Splitcoaststampers.  Here is the card I CASED:

I started by stamping, die cutting, and coloring my flowers.  Then I cut a black mat for each of the flowers, and I popped the flowers up onto the black mat.  I found some patterned paper to go behind the flowers.  I cut a strip of this paper and matted it with black cardstock.  Next I adhered the flowers to the card base.  For the inside I stamped and die cut the sentiment, and adhered it to the inside of the card.

Thanks so much for stopping by!!
Terri

Saturday, January 3, 2026

Gingerbread Coffee


Supplies: 
Stamps: Whipper Snapper: Winter Coffee
Ink: Memento Tuxedo Black
Paper: Gina K White and Kraft, HOTP Christmas Plaid, The PaperCut Wild Cherry
Accessories: Copic Markers, Gina K Rectangle Dies

Hello Stampers!  I'm back with one last card using the Whipper Snapper Winter Coffee Set.  Which do you like the best?  I can't decide!  LOL!  Here is the link to the first one I made with all of the details.  Check it out!

Thanks so much for stopping by!
Terri

Snowman Coffee


Supplies:
Stamps: Whipper Snapper: Winter Coffee
Ink: Memento Tuxedo Black
Paper: Gina K White, Colormates Medium Awesome Aqua, Lawn Fawn Perfectly Plaid 6x6 Paper Pad
Accessories: Copics, Gina K Rectangle Dies

Hello Stampers!  I'm here to share a card I made using the Winter Coffee stamp set again.  This time I used the snowman from the set to decorate my coffee.  Here's a link to the Santa that I used and it includes all of the details in making this card.  

Thanks for stopping by!
Terri

Sunday, December 28, 2025

Caffeine Holiday Greetings


Supplies:
Stamps: Whipper Snapper: Winter Coffee
Paper: Gina K White, SU Real Read and Basic Black, Recollections: Christmas Plaid 6x6 paper pad
Ink: Memento Tuxedo Black
Accessories: Gina K large and small rectangle dies, Copic Markers

Hello Stampers!  I hope you all had a wonderful holiday!  It is a dreary rainy turning into snowy day.  So it is a great day to hang out in the craft room!  I bought this Whipper Snapper set recently and didn't get a chance to use it.  The Featured Stamper Challenge gave me some inspiration to use it.  Here is the card I am CASEing:
I started with the focal image for this card, I stamped, die cut, and colored in the image.  Then I matted it in black.  The original card used a plaid patterned paper, so I found a plaid patterned paper to use on mine as well and matted it in black.  Then I adhered it to a red card base.  For the inside I stamped a sentiment, die cut it, and then matted it in black to finish the card.  Definitely a quick and easy card, but as always takes me forever to complete it. LOL!

Thanks for stopping by!
Terri 

Sunday, November 2, 2025

Happy Birthay


Supplies:
Stamps: Simon Says Stamp: Sunflower Dance, Stampin' Up Peaceful Moments
Paper: Gina K White and Stampin' Up Basic Black
Ink: Memento Tuxedo Black and VersaMark
Accessories: Simon Says Stamp: Sunflower Dance Die, Copic markers, Stampin' Up Branching Out Dies, Pink Fresh: Dotted Chevron Cover Plate, Brutus Monroe Alabaster White Embossing Powder, Honey Bee Gems

Hello Stampers!  I'm here to share a card I made for the Featured Stamper Challenge over at Splitcoaststampers.  Here is the card I CASED:

For my card I started with stamping, die cutting, and coloring the sunflower image.  After this I die cut two more of the sunflower images and adhering them together to create some dimension.  Then I stamped, heat embossed, and die cut the sentiment.  I again die cut a couple of layers of the sentiment, and adhered them together to add some dimension.  Next I die cut the white layer with the branching out dies, and then again die cut it with the dotted chevron cover plate.  I matted this with a black layer.  I adhered everything to the white card base, and finished off the card with some gems.  For the inside I duplicated the layers from the front and added a sentiment! 

That's all for now, thanks so much for stopping by!!
Terri

Sunday, October 19, 2025

Happy Anniversary


Supplies:
Stamps: Stampin' Up Charming Day and Falling For You, Gina K: Graceful Greetings Bundle
Paper: Stampin' Up Petal Pink and Gina K White
Ink: VersaMark and Stampin' Up Petal Pink
Accessories: Brutus Monroe Alabaster White Embossing Powder, Stampin' Up Beautiful Pattern Embossing Folder, Countryside Corners Dies, Petal Pink Ribbon, Copic Markers, Honey Bee Gems

Hello Stampers!  I was able to get into my craft room today.  I had parent teacher conferences this past week so I was not able to make a card last weekend, as I was filling out conference reports!  Ugh!  For this card I found this card to CASE for the Featured Stamper challenge over at Splitcoaststampers.

For my card I changed the orientation.  I started with a petal pink card base.  I cut a white layer and partially embossed it.  I added the petal pink ribbon to cover the seam between the embossed and non embossed sides.  Next I stamped, die cut, and colored in the focal image.  I popped it up with some dimensionals, and accented it with some gems.  For the sentiment I heat embossed it in white, die cut it, and adhered it to the white layer.  For the inside I stamped the sentiment, and die cut it.  I added a petal pink mat and that completed this card.

That's all for now, thanks so much for stopping by!
Terri

Monday, August 18, 2025

Oh Happy Day


Supplies:
Stamps: SU Playing in the Rain
Ink: Memento Tuxedo Black and Distress Ink Tumbled Glass
Paper: Gina K White
Accessories: SU Everyday Arches Dies, Playing in the Rain Dies, Raindrops Embossing Folder, Pickett Fence Blending Brush

Hello Stampers!  I survived my first day of inservice!  I was excited to get home to make a card for today's Clean and Simple Challenge over at Splitcoaststampers, the theme is weather wonder.  For my card I started by die cutting an arch and embossing it with the rain drops embossing folder.  Then I ink blended some tumbled glass on top to create the sky.  For the focal image, I stamped, die cut, and colored it in with Copics.  The bottom portion of the image did not cut out with the die cut, so I fussy cut out the puddle.  I adhered these pieces to the bottom of the arch.  Then I stamped, die cut, and highlighted the clouds with Copic markers.  Next I adhered the clouds to the arch, and glued the arch to a card base.  For the inside I ink blended the edges of the arch and stamped a sentiment.

That's all for now!  We'll see how day 2 of inservice goes... until next time!
Terri